Compatibility Guarantee - All Media Transferred Local

Photo Scaninning

Photo
Scanning

Slide Scaninning

Slide Scanning

Negative Scanning

Negative Scanning

Video Transfer

Video Tape Transfer

Film Transfer

Film
Transfer

Audio Transfer

Audio Transfer

Slideshows

Celebration
Videos

Latest Posts

Where to Convert Betamax to DVD

If you were around during the early to mid-80’s, you may remember the battle between Betamax vs. VHS. During a brief window when these tape formats were first released, consumers had the choice of either purchasing a new Betamax machine from Sony, or a VHS player, or VCR, from the JVC company. Due to a combination of marketing and economical factors, the eventual victor was the VHS tape. Not long after, Betamax tapes began to be phased out of production, leaving the many consumers who had purchased a Betamax deck to fend for themselves. Many Betamax customers ended up losing entire video collections because as time went on, it began to be increasingly hard to find a working, reliable Betamax deck, let alone a place to convert Betamax to another format!

Check out some of the marketing material that was going around during the great video tape war:

Fast forward a couple of decades later, and people nowadays often scratch their head when you mention a Betamax tape, either because they weren’t around for them, or simply forgot. The people that DO remember them mostly think they aren’t even watchable today. Well, it turns out that most Beta tapes, if they survived this long in ideal storage conditions, are usually able to still be played, and therefor be transferred to DVD. If you’re curious, bring the tape into a local DVD Your Memories store, and one of our video technicians can let you know if we can still transfer video from the tape! Even if it doesn’t play on the first try, we have the capabilities to repair Betamax tapes in order to get them working again for a Betamax to DVD transfer.

With the help of computers and other digital technology, we’re able to convert your Betamax to either DVD, Blu-ray or transfer them straight to you hard drive for editing purposes. Editing can be used to compile several tapes into one, or to splice together your favorite scenes. Just image seeing your 30 year old tapes appearing on Youtube! Come on in and relive the Betamax memories with our Betamax to DVD services:

Betamax to DVD in San Diego
Betamax to DVD in Orange County
Betamax to DVD in Los Angeles
Betamax to DVD in Denver

Record Your Life Story to Create Your Own Living Legacy

Life-Story

When I was a child, I remember my grandfather used to tell us all sorts of funny and exciting stories of his adventures across the world, how life was like for him growing up with his family, and other interesting quips about his life. Unfortunately, he passed before any of his wonderful tales were recorded. While we’re still left with fond memories of his story times, we would have loved if he recorded them so that we can re-watch them and pass down to our own children some day.

When a loved one passes on, everything changes. While we hold them dear to our hearts, it really would have meant a lot to us to have kept some of these great times on recorded video. In today’s world, this is now completely possible and even easy to accomplish using basic computer equipment and a little bit of skill. Here’s a few tips to get you started.

1. Develop a list of stories or passages you’d like to share on camera. This usually works best when you sit with some loved ones to help develop a core list of the top stories you want to use. When recording, you’re going to not want to read from a paper, but talk naturally, as if you were re-telling the story again, but this time to the camera.

2. Look for supplemental material such as old video tapes, audio tapes, photos, slides or other images that you can insert into the video to reference parts of the story. This is a great way to immerse the viewers into what you are talking about. If you’ve ever seen a documentary, very rarely do they focus on the narrator the entire time, but supplement what they’re saying with videos, images and sound to help the viewer gain a better understanding of what times were like in the story.

3. See if any other family or friends would like to join in and offer their take on any story. This can add some funny moments, especially for embarrassing stories!

4. Think of a clever introduction to your video, as well as a nice looking closing sequence. If editing on a computer, you can inject title slides into the beginning and end of the footage which can include text for things like credits, Title of the movie and so on.

5. Make sure you have the right equipment. The minimum you’d need would simple be a camcorder, or even a smartphone camera. However, for best results, we recommend recording it as almost a voice over, using a studio microphone for best clarity. This is something our in-house editors are very familiar with, and lots of families go this route.

Thinking of starting your own Life Story production? Contact us for custom editing services today!

Top 5 Photo Scanners of 2013

Both photo buffs and family archivists often turn to flatbed scanners to digitize photographs, slides and negatives. Many of the newer model photo scanners provide some helpful additional features such as the ability to scan non-print formats such as slides and negatives with or without the help of an adapter. Many of these scanners also include bundled photo editing software to help retouch scans and remove scratches. Here’s a short list of the 5 best we’ve seen from 2013, courtesy of pcmag.com

  • 1. Canon CanoScan 5600F

    1

    Any flatbed scanner is technically suitable for all-purpose scanning, since you can scan anything on it. But some are clearly targeted more for some uses than others. A case in point is the Canon CanoScan 5600F ($149.99 direct), which focuses on photos, and does its job well enough to deliver relatively high-quality scans for both photographic prints and film. Not many scanners manage both kinds of scans well, particularly at the 5600F’s price. That by itself is enough to make the scanner stand out—especially if you’re on a tight budget.

    Read the full review

  • 2. Canon Pixma MG8220 Wireless Inkjet Photo All-in-One

    2

    There are at least two contexts for judging the Canon Pixma MG8220 Wireless Inkjet Photo All-in-One ($299.99 direct). First, as big brother to the Canon Pixma MG6220 ($199.99 direct, 4 stars) that I recently reviewed, it offers essentially identical capabilities except that it adds the ability to scan 35mm slides and strips of film. Second, it’s Canon’s latest high-end home photo lab, meaning that it can print high-quality photos from so many different sources that you can reasonably use it just for photos without ever connecting to a computer. Either way, it’s impressive enough to be the new Editors’ Choice for high-end photocentric MFP.

    Read the full review

  • 3. Epson Perfection V300 Photo

    3

    Scanner technology tends to improve over time, benefiting consumers mostly through lowering the cost for a given level of capability. The Epson Perfection V300 Photo scanner ($99.99 direct, which includes a one-year parts-and-labor warranty) is a case in point. Coming a year after the now discontinued V350 Photo scanner, it is $50 cheaper and can run rings around the V350 in performance, particularly for scanning transparencies.

    Read the full review

  • 4. Epson Perfection V500 Photo

    4

    Epson has knocked one out of the park with this scanner. It offers high-quality scans for both prints and film and features an LED light source that eliminates warm-up time. Like almost any flatbed scanner, the V500 can handle all-purpose scanning, but it’s focused on photos. This makes it most appropriate for anyone (short of a professional photographer) who needs to scan a backlog of prints and film (including slides) to digital format.

    Read the full review

  • 5. Canon CanoScan LiDE 210 Color Image Scanner

    5

    Unlike most flatbed scanners meant primarily for photos, these LiDE scanners do not include any ability at all to scan film (meaning slides and strips of film). The advantage, quite simply, is that it keeps costs down, so if you don’t have any interest in scanning film, you don’t have to pay for a feature you don’t need.

    Read the full review

Tips on Organizing Generations of Family Photos

Stack_of_photos

Keeping your family photos organized is hard enough even if everything’s already digitized, but what do you do when you’re faced with decades of real photographs that aren’t organized at all. Read some tips from some people who have undertaken the task. Learn what helped them out the most and apply it to your project, or if you’ve got some ideas, jump in and help out a fellow reader over at Lifehacker.

Whether you’re doing a photo scanning, slide scanning or negative scanning process, the process of organizing them are generally the same or similar.

Here are a couple of great tips from the thread:

“I’ll echo what seems to be the consensus here: break it into manageable pieces.

I didn’t have anywhere near the amount of photos you do, but I did have family pics going back about 40 years or so. My first step was to get them all into albums. I first sorted them (as best I could) by year and then into particular events within the year (a birthday, a vacation, whatever). I got big albums thinking each could hold roughly a decade of pics. I also made sure to buy albums that give me a little writing space next to each photo.

After getting everything into albums, then came the digitizing process. I’d just dedicate a half hour or so a few times per week to scanning them using our flatbed scanner. When I scanned a photo, I’d just pencil in an S (for scanned) next to the picture. This gave me the luxury of not having to scan in order. I picked the pictures I wanted the most, knowing I could go back and get the others later.

After the scanning, I used Picasa to organize, mostly because the face recognition works really well. ”

“I just finished doing that exact thing this weekend. Did some research on scanners since my all-in-one was not producing very good results. Found that the Epson V700 was good at photo scanning. Too expensive to buy for this project so I rented one for the weekend from a pro photo store ($35 for the weekend). It took the majority of 3 days to do this right, but I now have over 1300 film photos now digitized. I then uploaded to a photo sharing site I use and now there is a permanent backup. It’s a long process but very nice to have this done finally.”

Click here to read more

5 Tips on keeping your Digital Media Safe into the Future

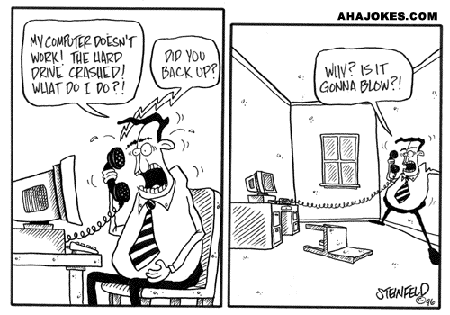
Keeping your digital files save from accidental deletion or other disaster is becoming a higher priority for all of us as technology moves forward. As more and more of our personal data such as videos, photos, accounting, business files, etc. are moved to a digital format, we need to be prepared in the event that your hard drive fails, or you’re unable to access your media for whatever reason. Losing all of your digital data is a nightmare scenario for a lot of us with important files. What can we do to ensure it’s survival?

backup

1. One way to keep your data safe that is gaining popularity is to use a cloud storage solution. With cloud storage, your data is stored in the cloud (online) with redundant backup systems to make sure your data will always be accessible and safe. However, if the internet is turned off for whatever reason, you will lose access to these files unless you have them stored locally as well. While cloud storage is convenient, you should NEVER depend on them as your only backup source, always keep a local backup source in conjunction with cloud storage.

2. Make at-home backups on a regular basis. For best results, we recommend placing your data on at least two or three drives, stored in different geographic areas. (Maybe keep one drive at your parents house, and another drive in a safe deposit box). This will ensure that if one drive goes down, you can still access the data from your secondary source.

3. Don’t forget mobile devices! These days, some of the best photos and videos I’ve taken have come from my smartphone, so it’s a smart idea to back this data up just as consistently as you would on a computer or laptop. Some phones include features to automatically back up your data when plugged into your computer.

4. Remember that your backups are only useful if you have the required software to read it. This means future-proofing your files. If you have word processing files from some completely obsolete program, it would be wise to then copy the files to a standard versatile TXT file, which you’d likely have much more luck opening in the future. A good rule of thumb here is to stick to file formats that can be read by open-source software today.

5. Keep an eye on your storage media, whether they be hard drives, flash drives or DVDs. If one of your backup drives fails, replace it immediately, before Murphy’s Law kicks in. In the longer term, you’ll want to move your data off various kinds of storage media as obsolescence sets in and move it onto newer ones once the newer technologies mature. Floppy disks went to the glue factory a decade ago, for example, and are quickly becoming unreadable. Writable CDs and DVDs are headed down this path; if you have data backed up on these, get them onto hard drives or solid-state media now.

DAT Tapes vs Audio Cassettes: What’s the Difference?

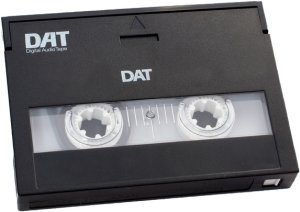
DAT tapes are often confused with standard analog audio cassettes, mostly due in part because they look the same, but that’s where most of the similarities end.

digital audio tape dat

Most of us are pretty familiar with the old audio cassette, as they were a large part of our lives growing up in the 1970’s through the 90’s. These cassettes were recorded in analog, which is a recording method that stores signals as a long continuous wave on the media. In the case of the audio cassette, the wave is the fluctuation in the field strength of a magnetic recording.

DAT tapes, on the other hand, uses a digital recording method to capture data onto the tape. DAT falls into the same type of recording that is used on CDs DVDs and digital sound files like MP3 or WAV. Digital recording is different from analog in that while analog is a continuous signal, digital recordings are not. Digital recordings use specific values to represent information. With sound, this means representing a sound wave as a series of values that represent pitch and volume over the length of the track.

Some audiophiles argue that because analog recording methods are continuous, they are better at capturing a true representation of sound because digital recordings can miss subtle nuances. However, as digital recording processes continually improve, digital devices can use higher sampling rates with greater precision. Although the signal still isn’t continuous, the high sampling rate can create a sound very similar to the original source.

Can Digital Recordings Sound as Good as Analog?

Early digital recordings often sacrificed sound quality, or fidelity, in favor of reliability. One of the main drawbacks of an analog format is that analog media tends to physically wear down over time. Vinyl albums can warp or get scratched, which will inevitably have an impact sound quality. Magnetic tape eventually wears out and is vulnerable to magnets, which can erase or destroy information stored on the tape. Digital media like compact discs can reproduce sound indefinitely, as long as the disc is taken care of.

However, due to the way it’s recorded, one of the benefits of analog recordings is that if the tape is partially damaged, you’d likely still be able to salvage much of the undamaged and even parts of the damaged recording with proper skill and care, while If a digital recording suffers even a small scratch, you could lose the entirety of the sound for that damaged portion.

Recreating Childhood Photos

Whenever we look back at old photos from our past, there’s always a couple of goofy photos that stand out and make you think, “What was I thinking?”. We all have pictures of our childhood, as parents tend to have a really hard time putting down the camera or camcorder when we are little ones. With so many documented moments stored as photos, there’s bound to be a few among them that make you wonder what was really going on.

A new clever trend is spreading around social media of people “recreating” their old childhood photos as adults. In one quick look, you’re able to see the child or baby someone used to be. Some photos are quite touching and others are just plain silly. Here are some of the best we’ve come across.

2

3

5

6

Do you have some old childhood photos that you need digitized? Check out our local photo scanning services which will allow you to post all of your favorites online for family and friends!

1 6 7 8 9 10 44