Select A Store
Los Angeles, CA
San Diego, CA
Orange County, CA
South Bay, CA
All Locations: Online Ordering
(877) 388-6093
Home
What We Digitize
Photo Scanning
Slide Scanning
Negative Scanning
Video Tape Transfer
Film Transfer
Audio Transfer
Video Tribute
Get Started
Why Us?
FAQ
Reviews
About
Store Locations
Contact
Select A Store
Los Angeles, CA
San Diego, CA
Orange County, CA
South Bay, CA
All Locations: Online Ordering
(877) 388-6093
Pricing & Quotes
Free Consult
Home
What We Digitize
Get Started
Why Us?
FAQ
Reviews
About
Store Locations
Contact
Photo
Scanning
Slide
Scanning
Negative
Scanning
Video Tape
Transfer
Film
Transfer
Audio
Transfer
Celebration
Videos
Photo
Scanning
Slide Scanning
Negative Scanning
Video Tape Transfer
Film
Transfer
Audio Transfer
Celebration
Videos
Latest Posts
Guidelines and Tips for Shipping Your Video Tapes
•
June 15, 2012
•
Chris
•
General
How to Transfer Audio Cassettes to CD and Other Digital Formats
•
June 12, 2012
•
Chris
•
Audio Transfer
How to Get Photos Off Old Floppy Disks
•
June 8, 2012
•
Chris
•
General
The Reel to Reel Audio Tape Machine
•
June 7, 2012
•
Chris
•
Audio Transfer
Creating Web Ready Images
•
June 1, 2012
•
Chris
•
Negative Scanning
,
Photo Scanning
,
Slide Scanning
Cool VHS Illusion
•
May 29, 2012
•
Chris
•
Video Tape Transfer
Instagram Your Old Photos Without an iPhone
•
May 25, 2012
•
Chris
•
Photo Scanning
Video to DVD Discount in San Diego
•
May 25, 2012
•
Chris
•
General
Difference Between Shooting Photos on Film vs Digital
•
May 21, 2012
•
Chris
•
Photo Scanning
How Does Film Work?
•
May 16, 2012
•
Chris
•
Film Transfer
Things to Think About Before Video to DVD Transfer
•
May 15, 2012
•
Chris
•
Video Tape Transfer
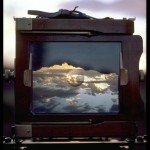
A Salute to 4×5 and Large format Photography
•
May 11, 2012
•
Chris
•
Negative Scanning
Photo Scanning Services in San Diego
•
May 7, 2012
•
Chris
•
Photo Scanning
Easily Categorize Church Audio and Prepare For Archiving
•
May 4, 2012
•
Chris
•
Audio Transfer
More Artwork Crafted From VHS, Audio Cassettes and Film!
•
May 3, 2012
•
Chris
•
General
Video to DVD Transfers in San Diego
•
April 30, 2012
•
Chris
•
Video Tape Transfer
DVD Your Memories Sponsorship in April
•
April 28, 2012
•
Chris
•
General
Types of Negative Formats – A List of Formats of Negatives
•
April 25, 2012
•
Chris
•
Negative Scanning
VHS Coffee Table
•
April 25, 2012
•
Chris
•
General
,
Video Tape Transfer
San Diego Slide Scanning Services
•
April 23, 2012
•
Chris
•
Slide Scanning
Types of Slide Formats – A List of Film Formats for Slides
•
April 17, 2012
•
Chris
•
Slide Scanning
DIY Large Format Camera
•
April 16, 2012
•
Chris
•
Negative Scanning
DVD Your Memories Web Update
•
April 12, 2012
•
Chris
•
General
DVD Your Memories Skirball Promotion
•
April 9, 2012
•
Chris
•
General
1
…
5
6
7
8
9
…
14