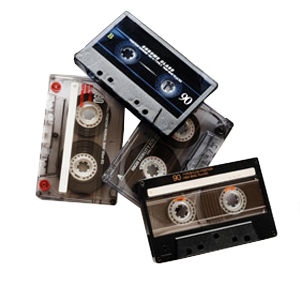
A common type of request we receive at DVD Your Memories is to convert old audio cassettes to CD or MP3. At our local offices, we perform many types of audio transfers in addition to audio cassettes to CD such as reel to reel audio conversions and vinyl LP to CD. What many people don’t know is how easy it is to perform these same transfers from your home! The requirements for the job are not much, and affordable as well. Many of us had an old cassette player that we used back in the 90’s and if you still have that plus a computer, you’re in business!
The first step is to get an audio cassette player, which can be a standlone deck, a walkman, or really anything is fine as long as it plays audio cassettes and has either a 3.5mm headphone jack or red & white RCA audio outputs. For optimum quality on your audio cassette transfers, we recommend a high-end player from a reputable manufacturer such as Sony or Panasonic.
Next, you’ll need access to a computer (Mac or PC) with a line-in jack. Most modern computers come with one of these inputs built into the motherboard, and are usually color coded so you know which one it is. The line-in is usually colored blue, just like in the image below.
Now, once you’ve set up your audio cassette deck or player and have it plugged in and turned on, try a test audio tape to make sure it’s still in working order and the sound quality is to your satisfaction. Also, be sure to inspect your player to find out what audio jack it’s supporting, whether that be a 3.5mm headphone jack or RCA cables. If your tape player only supports RCA cables, you’ll need to get a converter so that they can be plugged into the back of the computer. They are available for pretty cheap online, and you can find them easily by searching for “RCA to 3.5mm cable”. If you do notice that your player has a 3.5mm jack already built in, then all you need to get is a 3.5mm audio cable (the same one you’d use to hook your ipod up to external speakers or to your car’s stereo). Once the audio input is determined, plug one end of the 3.5mm cable into the headphone jack of your player, and the other end into the “Line-in” input in the back of your computer.
Now, all the hardware should be ready to go. The next step is to get the appropriate recording software. We highly recommend using Audacity, which is an open-source audio recording and editing program available for both Mac and PC here. Once installed, you’ll need to make sure your recording settings for both Windows and Audacity are set properly. If using Windows, navigate to control panel –> Hardware and Sound –> Sound then click on the “Recording” tab at the top of the window. Make sure that the Line-In is selected as your input source.
Before recording, also check to make sure Audacity is recording from the correct source by clicking Edit–> Preferences at the top menu and selecting Microsoft Sound Mapper (Input) as the recording source .
Make sure the tape you want to record is cued to the starting point and ready to be played. The last step is to now play the tape, then immediately press the record button on Audacity, which should now start recording your tape which is being fed through your computer’s line-in jack. When the tape has finished playing, or you decide that you’ve transferred enough, press STOP on Audacity and save the recording in the audio format that you wish.


