Compatibility Guarantee - All Media Transferred

Photo Scaninning

Photo
Scanning

Slide Scaninning

Slide Scanning

Negative Scanning

Negative Scanning

Video Transfer

Video Tape Transfer

Film Transfer

Film
Transfer

Audio Transfer

Audio Transfer

Slideshows

Celebration
Videos

Latest Posts

How to Convert Your Camcorder to DVD Movies

One of the easiest ways to convert your camcorder to DVD is to hook up the camcorder to a recording device such as a DVR with a DVD Burner. For this example I’ll be using a Sony Hi8 camcorder. To do this yourself, follow these steps.

camcorder to dvd RCA cables

1. Locate your camcorder and make sure you have the RCA (red, white, yellow) cables and the power cord.

2. Insert the tape you’d like to convert into the camcorder, and make sure it’s rewound. Plug the RCA cables into the video out jack on the camera, also make sure the power supply is connected, and plugged into the wall.

3. Insert the cables into the INPUT of the DVR or recording device. (make note of what input your used, as often DVRs have multiple inputs. This is normally clearly labeled just above or below the jacks as input 1, 2 or 3.)

4. Power on the DVR and ensure you set it on the same input as the step previous.

5. Test out the picture and sound by pressing play on the camcorder and making sure everything is fine on the monitor.

6. Rewind the tape back to the beginning, and then press play. Immediately after pressing play, hit record on the DVR and now your video will be recorded to the DVR’s hard drive.

7. From here, if your DVR supports burning video to DVDs you can burn your discs straight from the interface menu.

If you wanted a more advanced capture that would allow you the ability to edit or manipulate your footage, you’ll want to transfer it over to your computer first. To accomplish this, there are a variety of different methods you could try. For best results, you’ll want to get your hands on a video capture card or device that allows you to capture directly to your computer’s hard drive. For a guide on how to do this check out my guide on how to capture video using a Canopus capture unit. Feel free to comment for any help/tips. Good luck!

Disc Film Scanning in San Diego & Orange County, Irvine

Disc film is an old outdated Kodak format developed in 1982. Disc film came housed within a plastic cartridge which provided the user with a disc of 15 images, as negatives. The size of the negatives on the disc were 11x8mm exposures arranged around the outside of the disc, with the disc being rotated 24° between each image. The format, although convenient, did not prove to be particularly popular amongst consumers. This can be mainly attributed to the fact that the images were only 11x8mm, which resulted in sub-par quality on the resulting images. The film was intended to be printed with special 6-element lenses from Kodak, but many labs simply printed discs with standard 3-element lenses used for larger negative formats. The resulting prints often disappointed the consumer. The cameras did not last in the market very long, but the film stayed around quite a bit. In fact, it wasn’t discontinued by Kodak until 1999. Are you looking for a company to help you with disc film scanning?

DVD Your Memories is one of the few places left in the country which provides disc scanning services. If you still have cartridges of disc film, bring them on by to convert them to lasting images on DVD or hard drive. We scan disc film in a unique way using our premium Nikon scanners to get the best image possible. We recommend a resolution of 4000dpi due to the fact that these negatives are much smaller than a standard 35mm negative you’re used to seeing.

How to Unwind a VHS Tape

VHS tapes were never perfect. They often broke, got stuck in the VCR, or didn’t want to rewind. Whatever the problem is, it usually happens the the tape you care most about. If you’ve ever had a VHS tape that wouldn’t play, rewind, or fast forward, you might be able to fix it by manually rewinding your VHS tape. You will need to fix this issue if you ever wanted to do a VHS to DVD transfer, or even watch the tape again. Tapes usually get stuck when one of the reels gets caught on one of the cassette mechanisms, or there is a crease or foreign object blockage in the tape itself. Here’s how to easily unwind a VHS tape.

The first step is to try to manually rewind the cassette. You may notice that the white reels will not turn in either direction. To accomplish this, you’ll need to press something thin like a paper click or pencil into the socket in the back of the VHS tape. There is a small button here that when pressed, will unlock the reels so that they can be turned in either direction. Try turning the reels a few times with either your fingers, or using scissors like I do. Hopefully, the reels will begin to turn and with any luck you’ll be able to see what’s causing the blockage.

If you’re still unable to turn the reels after pressing the button on the back of the tape, you’re likely going to have to open the tape up to take a look inside. This is usually a case of a broken internal mechanism, or foreign object blockage. Unscrew the screws in the back of the cassette to separate the two shells. Check here for a guide on how to do this. Once you separate the tape, try to locate the source of the problem by turning the reels, or lifting them out and inspecting them. If you are experiencing a broken internal mechanism, it’s highly recommended you transfer the tape to a new cassette by following the VHS repair guide.


Convert VHS to iPod, Store Your Media on iPod and Smartphones

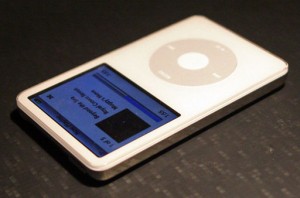
If there is one common trend this decade, it’s that consumers love new gadgets. From the iPod to in-car GPS devices, we pretty much have everything we could ever want, right at our fingertips. In this new wave of convenience devices, our lifestyles are changing dramatically. Remember how things were before cell phones, GPS and ipods? How did we ever survive? It’s almost like living in the dark ages compared to today! Thankfully, media has kept up remarkably well with the pace of technology and even allows us to place older media such as VHS to iPod! Today’s tiny cell phones and ipods can do the work of several devices, like shooting high quality video and pictures, all from the palm of your hand.

Nowadays, we are constantly using our personal devices like ipods and smart phones to share our memories with family and friends. Out on the go, you don’t always have the luxury of a DVD player or computer at your fingertips, so it can be a challenge to access your media while you’re on the go. Wouldn’t it be handy if you could store your home videos on your hand-held devices?… Good news, you can! Nowadays it’s easier than ever to convert your VHS to iPod? You could theoretically put your entire family history of media, right onto your iPod. Since the iPod is very similar to a computer hard drive, you can upload your media, and store them on a mobile device like an iPod or smart phone.

Many devices are now able to support a wide variety of video formats, but if you have an iPod or other device that is a slightly older model, you may need to convert the video to an MP4 format before it will be ready to be viewed on your device.

To convert the video, all you’ll need is a small, lightweight program called HandBrake. This program will take any video and convert it to iPod format. This is very useful, especially if you’d like to convert a wide range of video formats onto the iPod. As you may have guessed, this method could be used for your old VHS tapes, audio tapes, film and images as well so you can finally get that old VHS to iPod conversion you’ve always dreamed about.

First load up HandBrake, and then you’re going to want to choose your source video. This is where you pick the video you’d like to convert into the iPod format. Click “Source” and then “Video File” from the dropdown. (If you wanted to convert a DVD to iPod, you can alternatively choose a DVD movie from this menu, which will convert a whole DVD to Ipod fomat. Once you locate the video you’d like to convert, you now must choose your settings.

On the right side of the program, there are several preset settings which are useful for this project. If you have a standard iPod, you’d pick the iPod settings. On the other hand, if you have a more advanced device such as an iPhone or iPod Touch, choose the option built for those, as it’s a slightly better resolution. After you choose your settings, simply choose where you’d like to save the file, and then click start. After it’s done encoding you’ll see the finished video in the destination you chose.

Once your media is loaded onto your ipod or mobile device you will have the freedom to take your memories with you on the go, so go ahead and brag about your granddaughters ballet recital and reminisce about the days the kids were young, because now you have those special moments in the palm of your hand. With all the ways to view media today VHS to iPod is probably one of the most convenient, the process may be piece of cake but keeping your memories close to your heart is priceless.

8mm vs Super 8 Film, What’s the Difference?

8mm vs Super 8 Film

Different Film Formats

Both 8mm and Super 8 formats of film look really similar at first glance. That makes it hard to determine whether you’ve got your hands on either 8mm or Super8. That’s especially true if you’ve got a collection that contains both types of film. However, spotting the difference and recognizing what you have isn’t too hard, as long as you know what to look for. In future, you’ll be able to easily recognize 8mm vs Super8 after reading this. 16mm should be very easy to recognize, as it’ll be twice the width of both 8mm and Super 8. 35mm is equally easy to spot, as it’ll be four times the width of those, and twice that of 16mm.

The History of Film Formats

The oldest film that was really standardized was 35mm. William Kennedy Dickson, a photographer for Thomas Edison’s company, invented a device that could be used to view film that was 35mm wide. Edison patented and popularized the device, and in so doing standardized 35mm as the film format of the day. 16mm was introduced in 1923 by Kodak to give amateurs an affordable alternative to the expensive 35mm film. Kodak introduced a more affordable still format in 8mm during the Great Depression, for the purposes of making home movies. In the 1960s, Kodak started using cartridge-loaded film in a plastic cylinder to avoid the jamming issues that plagued older formats. With that innovation came the introduction of the even-cheaper Super8 format.

Spotting 8mm vs Super 8

8mm vs Super 8 dimension comparison

As the above image shows, Super8 film has much smaller sprocket holes. The sprocket holes are the perforations on each side of the film, and they help guide it through the camera from its canister smoothly. If you compare two reels of film and notice one has significantly smaller sprocket holes, that’s Super8. The frames are also much larger on Super8 film, hence the name. In short, to spot the difference between 8mm vs Super 8, look for larger sprocket holes and smaller frames. That’s the 8mm film. If you’ve got film in canisters that happens to contain leader tape, you can just look at the size of the sprocket holes on that, too. That’ll give you the same result. If you think your film might have sound on it, check out our guide about that here.

8mm vs Super 8 leader tape comparison

Any Other Questions?

Our film to digital technicians are very knowledgeable and can answer all your questions about your digital transfer. We’ve been the best film transfer company in Southern California since 2009. We are also one of the few digital transfer companies that clean every inch of your film prior to transferring. This cleaning process using silicone cloths will give you the best digital transfer possible. The older your film is, the more likely it is that it’s got dust on it, so especially for older film, cleaning it is a must. Whether it’s a 35mm film from the 1920s or a Super 8 film from the 70s that’s never left its canister, our process remains the same. Our technicians carefully clean every inch of your film before we transfer any of it. If you want to read more about our preparation process for transferring your film, we’ve documented it here.

Valentine’s Day Slideshow | Custom Valentine’s Video

Valentine’s Day Slideshow

valentine's dayThe new year is upon us and now Valentine’s day is just around the corner. Stumped on gift ideas? Well, it’s 2011 and time to think outside the heart-shaped box! Show your special someone how much you care by creating a Valentine’s Day Slideshow!

Have you considered creating your own special custom slideshow video for your Valentine? Instead of the typical chocolates and roses, why not light the fireplace and pop in a brand new, custom DVD filled with all your memories together. It will make her heart melt!

Don’t forget to add voice-overs to your video to give it an extra personal touch. Not only will it be very special for Valentine’s Day, but your video will be placed on a high-quality 100-year archival DVD complete with a compatibility guarantee, so you will never have to worry about your DVD not working some day.

Our talented editors are full of excellent ideas to make this the best Valentine’s day ever! Check out a quick sample of a Valentine’s Day slideshow that could be staring YOU! Don’t forget that we can create awesome videos like this for ANY occasion!

A List of Video Tape Formats, Types of Video Tapes

As technology progresses, we’re constantly switching out the old for the new. Well, as everyone already knows, this also applies to your family media such as video and audio tapes. There’s been so many different tape formats and shifts of technology over the years, it’s hard for anyone to keep track of the model names or equipment needed to play their old video tapes. Hopefully this list of video tape formats will help you figure out exactly what kind of tape you have, so you can give yourself a better idea of how to proceed. The chart below lists the various tape formats of audio we can transfer to CD or hard drive. While not as complicated as the multiple types of video tapes, it can still often be confusing as to what exactly you’re looking at.

Microcassette -Introduced by Olympus in 1969 -Smaller than a standard audio cassette -Typically used for voice recordings and home answering machines Microcassette to CD
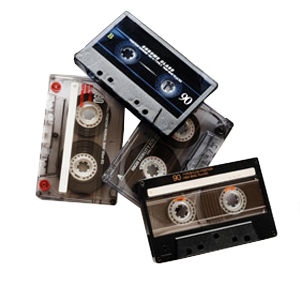
Audio Cassette -Format developed by Phillips and released in 1963-1964 -Most popular audio recording medium for consumers until the development of CDs Audio Cassette
Reel to Reel -Developed in the 1940s -Can be recorded and played at various speeds. Reel to Reel Audio
LP/Vinyl Record -One of the earlier recording mediums as it was developed in the late 1800s -Could be played at various speeds, still popular to this day. Vinyl Record

List of supported video tape formats.

MiniDVD -DVD disc having 8 cm (3 in.) in diameter. -Recordable 8 cm discs are commonly used in DVD-based camcorders. Depending on variant, these discs can offer up to 5.2 GB of storage space. MiniDVD
MicroMV -MicroMVwas a proprietary videotape format introduced in 2001 by Sony. -Physically the smallest of all video tape formats, 70% smaller than a MiniDV cassette MicroMV
MiniDV -Released in 1998 as part of joint efforts of leading producers of video camera recorders. -Recorded in digital (DV) same as Digital8 -Tapes could hold 1hr SP, 90min EP MiniDV
Video8, Hi8, Digital8 -Developed through the 80s and 90s -Most popular consumer camcorder tapes through the 90s due to small form factor and higher quality than that of the VHS. Video8
VHS-C -Released by JVC in 1982 as a compact VHS. -The format is based on the same videotape as is used in VHS, and can be played back in a standard VHS VCR with an adapter. VHC-C
VHS -Developed by JVC and introduced in 1976. -During the late part of the 1970s and the early 1980s, the home video industry was involved in the VHS vs. Betamax war, which VHS would eventually win.
Betamax -Developed by Sony, released on May 10, 1975. -Although generally considered the superior quality tape, Betamax lost the format war to VHS in the 80s. Betamax
3/4″ U-Matic -Developed by Sony, released in 1971 as a professional video tape format. -It was among the first video formats to contain the videotape inside a cassette, as opposed to the various open-reel formats of the time. U-Matic
Betacam -Developed by Sony in 1982. -The format supplanted the three-quarter inch U-Matic format, which Sony had introduced in 1971 Betacam tape
1 34 35 36 37 38 44