Compatibility Guarantee - All Media Transferred Local

Photo Scaninning

Photo
Scanning

Slide Scaninning

Slide Scanning

Negative Scanning

Negative Scanning

Video Transfer

Video Tape Transfer

Film Transfer

Film
Transfer

Audio Transfer

Audio Transfer

Slideshows

Celebration
Videos

Latest Posts

Creating Art From Google Scanned Images

Andrew Norman Wilson got a lot of attention last year for his Workers Leaving the Googleplex video, which depicted a little-known group of contractors at Google’s HQ, charged with doing the scanning that feeds Google’s mission to digitize every book that it possibly can.

While Wilson lost his own contractor job in video production at Google as a result of the video, he still holds a fascination with Google’s ‘ScanOps’. This is a term for a team of people at Google that involves strictly data-entry labor, or more appropriately, the labor of digitizing. These workers are identifiable by their yellow badges, and they go by the team name ScanOps. ScanOps is supposedly a marginalized group of workers who don’t get all of the same perks that Google employee’s are famous for. They scan books, page by page, for Google Book Search. The workers wearing yellow badges are not allowed any of the privileges that typical Google employees are allowed – ride the Google bikes, take the Google luxury limo shuttles home, eat free gourmet Google meals, attend Authors@Google talks and receive free, signed copies of the author’s books, or set foot anywhere else on campus except for the building they work in.

The latest manifestation of Wilson’s artistic work is that of images scanned by ScanOps, but those of which that display errors, usually of the scanner technicians hand being shown in the shot, or of the wording on the page being heavily distorted or stretched.

Wilson explains:

“ScanOps is based on Google Books images in which software distortions, the scanning site, and the hands of “ScanOps” employees are visible. Through varied analog presentations of these images, the material resources and processes that compose the digital are emphasized.

“These re-materializations are treated as photography – therefore they are framed to become image-sculptures, will be compiled in an art-book, and presented in a live lecture.”

ScanOps has been presented at Reed College in Portland, OR, and is due to be shown at the San Francisco International Film Festival, the Images Festival in Toronto and the Threewalls gallery in Chicago. Meanwhile, Wilson says that he has grants from the Illinois Arts Council and the Dedalus Foundation to shoot an extension of the original video, which we’ve included below.

Wilson says that his Google-focused work examines “the transformations and continuities in arrangements of labor, capital, media, and information.”

Benefits of Transferring Your Media Locally!

DVD Your Memories is one of the few companies primarily built for our local customers who wish to transfer their old memories and convert them to a more modern format, such as local VHS to DVD in Orange County, slide scanning to DVD Los Angeles, and transfer audio cassettes to CD. VHS tapes in particular was a very popular format for recording priceless home movies. Often times, these tapes can run in excess of 6 hours or longer! Many of us would find it stressful to send such important items away in the mail, when there are more convenient local options available. vhs to dvd los angeles Peace of Mind – Keeping your media local will ensure that your media will not get lost in transit, or misplaced at any point during the shipping process. Since we handle all of our orders directly in our offices, you’ll know where your precious media is at all times. Once you leave your memories in our hands, they will remain safe until you come in to pick up your new DVDs. Customer Experience – DVD Your Memories is set up to allow one on one interactions with the technician working on your order. This starts with the initial order-taking process. If at all possible, we will match your order type with the technician who will be doing the bulk of the work on the order. (For instance, if you had order of film to DVD in San Diego, our san diego film technician, Ilo, would be the one to take your order that day). This same technician will also be contacting you throughout the transfer process to indicate when the order had been completed, or if any additional information is required. In turn, our customers are encouraged to contact their technicians through phone or email, if they think of anything else they’d like to add or otherwise change their initial order. This will help ensure that your order is processed to your exact specifications and details. Fast Turnaround – When dealing with local companies, you will often get a much faster turnaround than if you were to mail it off to a processing facility. Depending on how much media you bring in, we can sometimes have your order finished within 24 hours. This alone will save you not only time, but massive shipping and handling costs. Visit our store locator page to find the DVD Your Memories around your area. San Diego: 8305 Vickers St. Suite 206 San Diego, CA 92111 (858) 503-7965 sandiego@dvdyourmemories.com Orange County: 18226 W. McDurmott Street, Suite D Irvine, CA 92614 (949) 679-7333 orangecounty@dvdyourmemories.com Los Angeles: 3710 South Robertson Blvd Suite 205 Culver City, CA 90232 (310) 836-1403 losangeles@dvdyourmemories.com Denver: 7720 E Belleview Ave. Suite B-103 Greenwood Village, CO 80111 (303) 221-2720 denver@dvdyourmemories.com
Local VHS to DVD Transfers – Benefits of Going Local

DVD Your Memories is one of the few companies primarily built for our local customers who wish to transfer their old memories and convert them to a more modern format, such as local VHS to DVD in Orange County, slide scanning to DVD Los Angeles, and transfer audio cassettes to CD. VHS tapes in particular was a very popular format for recording priceless home movies. Often times, these tapes can run in excess of 6 hours or longer! Many of us would find it stressful to send such important items away in the mail, when there are more convenient local options available.

vhs to dvd los angeles

Peace of Mind – Keeping your media local will ensure that your media will not get lost in transit, or misplaced at any point during the shipping process. Since we handle all of our orders directly in our offices, you’ll know where your precious media is at all times. Once you leave your memories in our hands, they will remain safe until you come in to pick up your new DVDs.

Customer Experience – DVD Your Memories is set up to allow one on one interactions with the technician working on your order. This starts with the initial order-taking process. If at all possible, we will match your order type with the technician who will be doing the bulk of the work on the order. (For instance, if you had order of film to DVD in San Diego, our san diego film technician, Ilo, would be the one to take your order that day). This same technician will also be contacting you throughout the transfer process to indicate when the order had been completed, or if any additional information is required. In turn, our customers are encouraged to contact their technicians through phone or email, if they think of anything else they’d like to add or otherwise change their initial order. This will help ensure that your order is processed to your exact specifications and details.

Fast Turnaround – When dealing with local companies, you will often get a much faster turnaround than if you were to mail it off to a processing facility. Depending on how much media you bring in, we can sometimes have your order finished within 24 hours. This alone will save you not only time, but massive shipping and handling costs.

Visit our store locator page to find the DVD Your Memories around your area.

San Diego:
8305 Vickers St. Suite 206
San Diego, CA 92111
(858) 503-7965
sandiego@dvdyourmemories.com

Orange County:
18226 W. McDurmott Street, Suite D
Irvine, CA 92614
(949) 679-7333
orangecounty@dvdyourmemories.com

Los Angeles:
3710 South Robertson Blvd Suite 205
Culver City, CA 90232
(310) 836-1403
losangeles@dvdyourmemories.com

Denver:
7720 E Belleview Ave. Suite B-103
Greenwood Village, CO 80111
(303) 221-2720
denver@dvdyourmemories.com

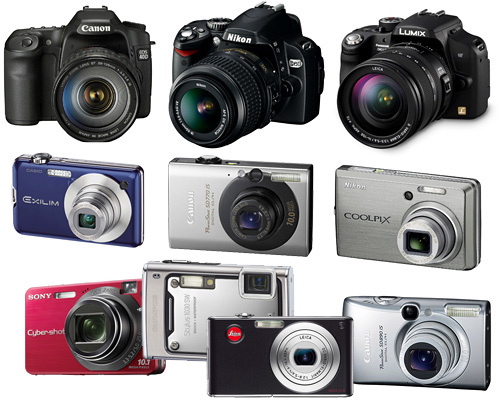
A Snapshot History of Digital Camera Technology

digitalcam

The word revolutionary is over-used in the technology field, but there’s no other way to describe the impact of digital photography. It has never been easier to capture high quality photos and videos, and we share hundreds of millions of them on the Internet every single day.

With roots in NASA research, and government spy satellites, digital imaging was originally envisioned as a way to overcome the limitations of traditional film cameras. Digital photography for the mass market really began with the invention of the charge-coupled device (CCD) in 1969. Here was an image sensor that could convert photons into electrons, taking light through a grid of picture elements (pixels) and storing it as an electrical charge.

Storing photos

It was the mid-1970s before electronic cameras began to hit the commercial market. The next problem to solve was storage. Some of the first digital cameras recorded images to cassette tapes, and even into the 1980s most used floppy disks.

Two important developments began to bear fruit in the early 1990s.

Firstly, the Joint Photographic Experts Group, created in 1986, released the first JPEG standard in 1992. This was a codec for image compression, enabling an image to be compressed into a stream of bytes roughly one-tenth the size of the original image without much perceptible loss in quality.

Then there was the first camera to use a solid-state memory card. It appeared in 1989, but it was never commercially released, and it would be another couple of years before the technology came down in price far enough to be a viable solution for mass market digital cameras.

Viewing and manipulating images

In the mid-1990s the first digital camera to have a built-in LCD display for reviewing photos hit the market. Images were compressed and stored on a memory card. Dispensing with the need to hook up a camera to a computer or monitor to view the photos was a ground-breaking step.

One of the major strengths of digital photography is the ease with which anyone can edit and alter photographs after capturing them. A number of software packages sprang up enabling increasingly complex manipulations (photoshop was already being used as a verb in 1992), but these programs required the user to download photos to a computer first.

As basic firmware on digital cameras has gradually improved and the hardware has grown more powerful, photographers are now able to create and edit images and videos directly on the device. Simple adjustments to brightness and red eye correction have given way to complex post-processing filters and effects.

Taking over video

In the last decade, the same advances in storage capacity and compression that made digital cameras so attractive for photography reached the stage where they could do the same for video. Camcorders are declining in popularity as digital single-lens reflex cameras (DSLRs) can now do everything a camcorder does and more. The first DSLR capable of recording video at a 1920 x 1080 pixel resolution was released in 2008.

In 2014 compact digital cameras and smartphones are enough to satisfy many consumers’ video needs; the ability to capture full HD 1080p footage at 60 frames per second is not unusual. Audio recording quality still lags behind, but that is more of a concern for professional videographers.

Smaller and smaller

The development of mirrorless camera systems, which first burst onto the scene in 2008, has paved the way for further miniaturization. Traditional DSLR cameras have an arrangement of mirrors inside that enables you to see exactly what the lens sees when you look through the viewfinder.

Dispensing with mirrors, but retaining large image sensors, enabled manufacturers to make smaller and lighter cameras, but retain the speedy performance, interchangeable lenses, and fast autofocus that made DSLR cameras so popular.

The rise of the smartphone has driven manufacturers to find new ways to fit the latest camera technology into increasingly svelte devices. The quality of point-and-shoot compacts has improved dramatically. It’s possible to capture increasingly high quality images and videos on ever smaller devices.

Captured in the cloud

Despite improvements in compression and increases in storage capacity, the pressures of capturing larger images and HD video are presenting new problems. The growth of the cloud aims to solve them as Wi-Fi enables wireless backups to a wide array of online services. The development of Eyefi SD cards with built-in Wi-Fi brings the same capability to older camera hardware.

The idea that you could capture a photo, edit it on the camera, and then upload it to share with the world, all within a couple of minutes would have been unthinkable just 20 years ago. Imagine what the next few years might bring.

Read the full article here: https://venturebeat.com/2014/06/26/a-snapshot-history-of-digital-camera-technology/

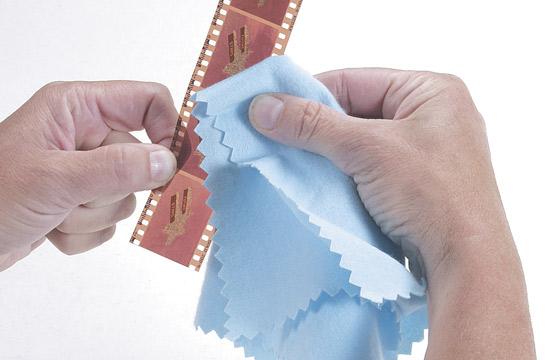
Preparing Your 8mm Film for Transfer

film_cleaning

To ensure that your film to DVD transfer achieves the best possible quality, cleaning and conditioning your film prior to transfer is crucial. Cleaning and prepping your film for transfer can be a time-consuming process, but will ensure optimal transfer quality. There are actually several different factors that can lead to quality issues of 8mm film.

Some of the damage your film has endured over the years can be carefully remedied, while others may not. Inspecting your film prior to transferring can help you to identify problems with the film before you even start transferring. Inspecting the film can be done with a trained eye, or by loading the film onto a projector to see what the quality is. Although scratching and wavy lines running through the film are fairly common, it is not the most serious issue that can be present in old film.

Film which has been left for long periods of time in humid environments such as coastal or tropical regions tend to develop mold, mildew or other types of fungus. Typically, the mold will start on the outer edges of the film and grow inward toward the emulsion. These types of mold have a distinct smell and looks like a white powder around the edges of your film. Mold, if left untreated, will inevitably lead to the deterioration of your film.

If the mold growth is isolated in the outer edges, a thorough cleaning can stop its progress before it gets to the emulsion. There are chemicals available to get rid of these microorganisms from the emulsion but it usually erases the images as well… So it’s best to use a non-abrasive silicon cleaning cloth to remove any dirt, dust and mold prior to a film transfer project.

Shrinkage should be measured before you can have the film transferred to digital format. 0.8% to 1% shrinkage carries the possibility that your film will be further damaged if you load it on a projector. 2% shrinkage virtually renders transfer impossible even with the best labs. To measure shrinkage, a Shrinkage Gauge is used but you can also do it manually by comparing 100 frames of the film to 100 frames of new film.

Keep Your Memories in the Cloud

CNet Senior Editor, Donald Bell, walks you through the different ways to store your memories in the cloud. Learn about choosing the right cloud storage service that is a perfect fit for you and your media.

Your Camera’s Histogram and How it Works

Ever wondered what your camera’s histogram does? Or how it’s used? Watch this short video by John Greengo for CreativeLive which will explain what the histogram actually is, how to read one, and what it means for your photography.

histogram

1 2 3 4 5 6 44