Compatibility Guarantee - All Media Transferred Local

Photo Scaninning

Photo
Scanning

Slide Scaninning

Slide Scanning

Negative Scanning

Negative Scanning

Video Transfer

Video Tape Transfer

Film Transfer

Film
Transfer

Audio Transfer

Audio Transfer

Slideshows

Celebration
Videos

Latest Posts

Top Rated Photo Scanners

Proper photo scanning equipment isn’t cheap, so it’s best to be as prepared as possible before you make your purchasing decision. Below is an excerpt from about.com which details some of the top rated photo scanners on the market today.

1. Epson Perfection V500 Photo Scanner


This Epson photo scanner gives great value for under $200. It comes with great bundled software (including Adobe Photoshop Elements) and holders for slides and negatives. The holders feel a bit flimsy and the automatic document feeder is extra, but otherwise this did a great job of digitizing some old negatives and photographs, and helping me get them looking new again. With a little more paper documentation, this Epson photo scanner would be even better, but it’s still a great deal.

2. Pandigital PhotoLink One-Touch Photo Scanner


The Pandigital Photolink One-Touch Photo Scanner is small, affordable, and did a decent job in scanning photos (and did it quickly too). It may not be the choice of professional photographers, and it doesn’t scan negatives or slides, but for the home user looking to get that box of photos organized, this is a good deal.

3. Epson Perfection V700 Photo Scanner


This pricey Epson photo scanner uses a Dual Lens System, where the scanner automatically chooses from two lenses to give the best scan resolution. It also features easy ways to digitally remove dust and scratches from film to make retouching simpler (and comes with additional image-editing software). With 48-bit color depth, there’s no question that you’ll get rich images. The unit can hold 12 35-mm slides or 24 35-mm film strips. Epson’s suggested retail price is $549.99, and for that price it’s not surprising that it makes an effort to provide some all-purpose scanning capability, with features like optical character recognition. Epson photo scanners typically get great reviews, so it may be worth the investment.

Click here to read the full article…

What is DPI? A Guide for Photo Scanning

Definition of DPI and PPI

What is DPI?

DPI, or Dots-Per-Inch is a measure of how granular a printer goes when printing an image. When a printer prints an image, it prints a specific number of dots per inch of paper. If you put a printed image under a microscope, you’d see that you don’t have a sheet of paper that’s entirely colored in. There’d be tiny little dots with gaps between them. DPI is an important thing to consider for things like printing, photo scanning, and even when using something like a gaming mouse. A mouse scans an image below it with a certain degree of granularity just the same way a copier does.

Inkjet vs Laser Printers

The better the printer, the smaller the dots and the gaps. Modern inkjet printers commonly print dots that are 60-90 DPI. They manage that by using tiny nozzles with a diameter of around 1/5000th of an inch. Those nozzles spray tiny quantities of ink onto the paper, which when viewed as a whole, displays a printed image. Even more precise still are laser printers. They use electrostatic charges to apply toner (ink that’s had an electric charge applied to it) to paper. The laser printer projects the image onto a drum, which in turn fuses the toner to the paper in the configuration of said image. That method of printing yields results of 600-2400 DPI. Inkjets, however, have the advantage of using analog combinations of ink. Images tend to look better on them than on laser printed images, even though the DPI is much higher. Our rule of thumb is to use inkjets for images and lasers for documents. Here’s a more extensive explanation and comparison.

Definition of PPI

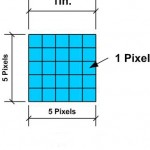
For the purposes of a photo scanning project, the concept of DPI is important. Equally important is its digital cousin, PPI, or Pixels per Inch. This measure is much less fuzzy and dependent on things like ink dots than DPI. A pixel is defined as a certain square area that has a color scheme on the RGB or CMYK spectrum. The more of those which are contained in a digital image, the more information is contained within the image. See the three images of a tree below. They’re drawn from the same source image, but the quality degrades rapidly with the PPI. It happens much more quickly than you’d think — the DPI difference between the second and third images isn’t very much, but the quality difference is huge. The quality of an image decays much more rapidly than the PPI.

tree with good DPI

tree with poor DPI

tree with very bad DPI

DPI and PPI for Photo Scanning

Different photo scanning projects call for different DPI and PPI standards. The short and long of it is that images with a higher PPI take much, much longer to scan than images that don’t. It’s important to remember that we measure DPI and PPI in linear, not square, inches. Since there’s no such thing as an image that doesn’t have two dimensions, scanning time will increase exponentially with PPI. Take a one-inch by one-inch postage stamp. If we scan it to a 200PPI file, we’re going to be scanning 40,000 pixels. Say we have our scanners scan it to a 300PPI file: the pixel quantity balloons to 90,000. If you’re scanning a large quantity of photos or negatives for the purposes of making thumbnails, consider scanning at a comparatively low PPI. It’ll expedite the process, and if you’re using a company, it’ll be much cheaper. However, if you’re scanning for the purposes of viewing, archiving, or printing, scan at a higher PPI. The results are better and the extra charge is worth it.

Different Image Types

Maybe you’ve got slides, photos, and negatives of the same images and you can’t make up your mind which resolution you want to scan them at, and which of the formats you’re going to scan. We’ve written extensively about that here. If you want to know more about different types of image scanners, rather than printers, here’s our guide.

How to Save Youtube Videos on Your Computer

Have you ever been to Youtube and wanted the ability to save Youtube videos on your computer to view later with no load times?

There are a few great methods to use in order to extract the video from Youtube. The easiest method to save online video is to visit the site https://www.keepvid.com

Once on the site, you will notice a bar at the top where you can input text. What you want to do is find the Youtube video you’d like to save, and copy the URL. For example if the Youtube video you want to save is at: https://www.youtube.com/watch?v=zT1AZE1dpe4

You would type in https://www.youtube.com/watch?v=zT1AZE1dpe4 in the input box. After you type this URL in, click download.

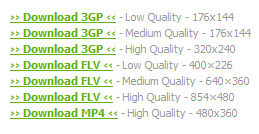
You will be directed to a new page which will ask you if you want to run an applet. Click ‘Run’ and you will then be provided with a list of all available media to download on that particular page. With Youtube videos you will often see videos of varying quality, so you have a choice of whether to download the low-resolution, or high-resolution videos.

This trick will also work for other popular media sharing sites such as Dailymotion, Metacafe, Google Video etc.

How to Fix an Audio Cassette, Audio Cassette Repair Guide

Dealing with an audio cassette repair is similar to the “How to Fix a Video Tape” guide I posted earlier. To make things easier, the tools I used were splicing tape, a small flathead screwdriver, and a new blank cassette tape.

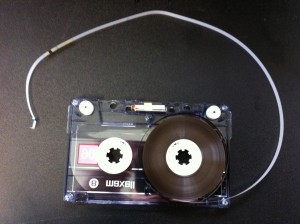
The first step is to inspect what type of damage your cassette has, the most common types of problems are either a break in the tape, the tape creased and flipped somewhere. This guide will detail how to fix a cassette tape that has been pulled off one of the reels. This is a pretty common example of a damaged audio cassette, so in most cases the steps are the same.

audio cassette repair

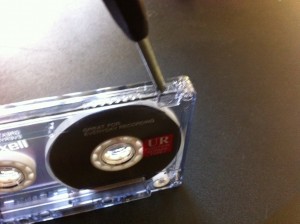
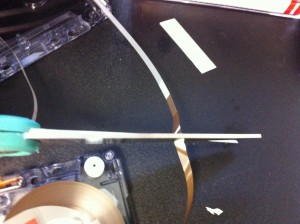
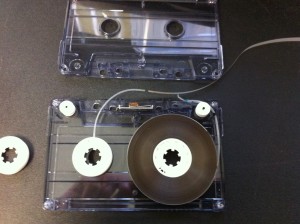
After you have discovered the source of the problem, you’re going to need to open up the cassette. Your cassette tape will either be glued, or held together with screws in each corner. If you are attempting to repair a tape that has been glued together, you literally have to break the casing in half in order to attempt any sort of repair. You can easily accomplish this by sticking a flathead screwdriver into one of the small openings at the bottom of the cassette, and prying it open that way
.

fix audio cassette

Be careful not to lose the parts inside as you break the casing apart, as sometimes they can go flying onto the ground.Once the cassette shell has been opened up, you can now get to work. For many cassettes, especially older ones, the tape will have pulled itself off one of the reels.

repair cassette tape

When the tape is pulled off the reel, it can be difficult to thread it back through the reel, and even if you do manage to do it, chances are that it will not last for long. The recommended fix for this problem is to purchase a blank cassette at your local electronics store that we can use for parts. *Make sure the new cassette you buy has screws and not glued together.

fix cassette tape

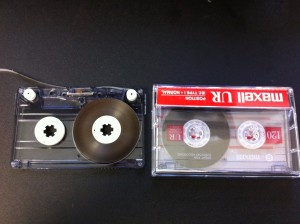
We’re going to open up the new cassette just like we did with our damaged tape.

Audio repair cassette

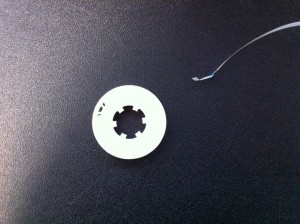
Take the reel from the new cassette and cut the tape about 1-2 inches from the end of the leader tape. This will give you a brand new reel, and a nice piece of tape to splice the broken tape onto.

fix audio cassette

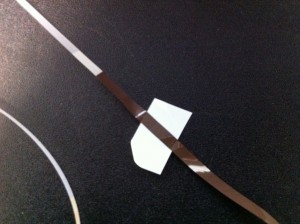
Remove the old reel from your cassette, and replace it with the reel you just cut from the new cassette. You now have enough room to easily splice the two ends together with a piece of splicing tape. You want the ends to meet as flush as possible, with no overlap of tape. This is possible without a splicing block, just keep in mind you’re going to be working with pretty thin tape, so it may take some patience and steady hands.

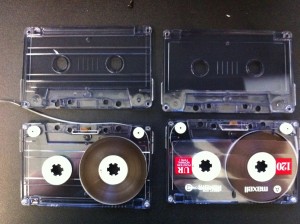
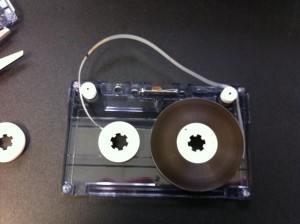
After your tape is spliced together, we need to set it back in the casing the way we found it. You can look at the picture below to see the correct layout. It’s easier to thread the tape through the notches with a small screwdriver or tweezers.

Screw the casing back together again, and use a pencil or something similar to make sure the reels turn correctly and don’t get stuck. After these steps, your audio cassette should be ready for a cassette to cd transfer or just plain listening again!

Happy Thanksgiving From DVD Your Memories

Thanksgiving is here again. Time to feast on Turkey, potatoes and pie, and hang out with family and friends. This is considered the busiest traveling day of the year, as thousands and thousands of families are reunited for the holiday. For those of us who don’t get to see our family as often as we’d like, this is a great chance to bond and create new memories. What better time to show off your new video to DVD or newest custom slideshow creation from your old slides! You’re custom made videos will be awe-inspiring to everyone around you. It’s fun to see the everyone’s face light up when they see themselves as a child, or doing the silly things that were recorded on tape over the years.

This time of year also marks the busiest shopping season of all. Millions of shoppers will flood the stores hoping for great deals, and lots of gifts to bestow upon loved ones. It’s been shown that many people, especially our family members, prefer thoughtful or meaningful gifts over expensive ones in the holiday season. Have you ever considered converting your family media to DVD as a gift idea? I bet mom would be so happy to receive a gift box full of brand new DVDs containing all of the family memories over the years! Our VHS to DVD transfers are great for gifts and stocking stuffers. DVD Your Memories is one of the few companies who convert video to DVD of all consumer formats in the country. All you have to do is bring us your tapes, and we’ll take care of the rest and hand you back a full set of DVDs to enjoy for decades.

As a reminder, our offices will be closed from 11/25 to 11/28 for the Holiday weekend, we’ll reopen on Monday.

Have a wonderful Thanksgiving weekend!

One of the Top Media Transfer Companies in the Country

DVD Your Memories has risen to the top ten family media transfer companies in the nation! By continuing to provide our outstanding service, and quality media transfers, we are sure to be the top media transfer company in the nation! We dedicate ourselves to providing families the chance to preserve and protect their recorded memories for years to come. Below are some of our highlight services.

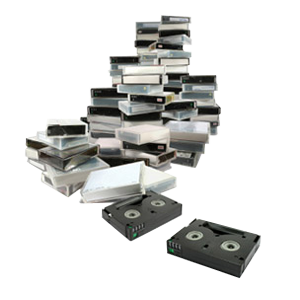
Video Tapes to DVD
Our video tape to DVD service allows you the chance to convert your old video tapes (VHS, Video8, MiniDV etc.) into an 100-year archival DVD movie that can be enjoyed by everyone on your home DVD player. One of the most popular consumer tapes from the 80s and 90s was the VHS tape. We can convert your VHS to DVD in San Diego and Irvine and we can even perform VHS repair and video restoration services as well! We do all we can in order to extract whatever data remains on damaged tapes.

Audio to CD Transfers
We can also transfer and convert your audio formats into audio CDs or MP3 files. Our expert audio technicians will inspect and clean your audio prior to transferring and make any repairs or adjustments needed. We can create custom mix CDs which incorporate audio from several sources, if needed. Our audio cassette to CD services has helped countless people hear the voices of the past once again.

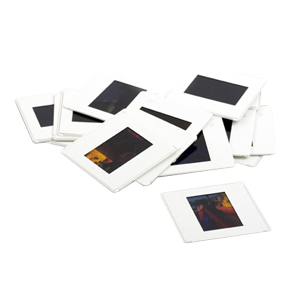
Slide Scanning
Our skilled image scanning technicians have an expertly trained eye for proper colorization and image quality. We use the highest grade slide scanning equipment available, and we’re able to scan your slides up to 4000dpi to provide you with a crisp, crystal clear image that you can take wherever you go on with our slides to DVD or portable hard drive services. You’ll be amazed at how awesome your slides will look once they are digitized on our scanners.

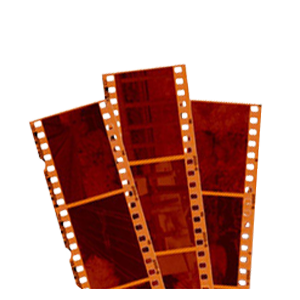
Negative Scanning
In addition to slide scanning, we also offer our premium negative scanning services in San Diego and Irvine. We’ll scan your negatives using a high quality dedicated Nikon film scanner. Our scanning technicians are experienced in handling a wide array of formats and sizes in order to create perfect digital images from your negatives.

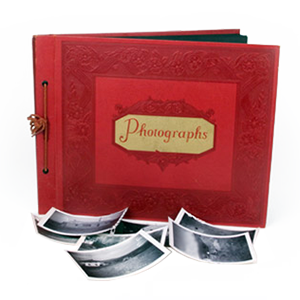
Photo Scanning
Just about everyone has loose photos laying around, many of them of important times in your life. We can take those photos and preserve them forvever onto our 100-year archival DVDs by taking advantage of our photo scanning services. All of your photos are scanned by hand using high quality flatbed scanners. We never use document feeders or any other automated equipment, as we manually scan each and every one of your photos, and make any adjustments necessary to provide you with the best possible scan.

8mm-16mm Film to DVD
Have old reels of 8mm, 16mm, or Super 8 film? We can take those old canisters of film and turn them into modern DVD movies! With today’s technology, we can bridge the technological gap between film and digital video in order to create a fully functional DVD movie that can be watched on any modern equipment. We also offer the option for color correction and contrast adjustment for all of your film. Forget that old projector, all you need to do is simply insert the DVD into your player, and watch the magic of our Film to DVD transfers!

Custom Slideshow Creation
Our experienced in-house editors will create the perfect slideshow for your occasion or give you their expert advice as to how to create one yourself! Think of all the times you’ve been to big parties, or nicely organized events with a custom video slideshow presentation. Maybe you wondered how to create such a beautiful video using your own personal photos, slides and negatives. Look no further, as you can now be the director of your very own movie!

The friendly, expert technicians at DVD Your Memories, Inc. promise to convert your media to digital format in our local, on-site facility with a commitment to one-on-one service, safe handling, and 100% order accuracy.

Custom Slideshow Creation in San Diego & Irvine

Create a Photo Montage Slideshow From Scanned Images

Bring life to your next family party or event by creating the perfect custom slideshow presentation for your guests! If you’ve taken advantage of our photo, slide, or negative scanning services, you are one step ahead of the game. The only part left to do is assemble your images in the order you specify, and then start building your slideshow! Our experienced in-house editors will create the perfect slideshow for your occasion or give you their expert advice as to how to create one yourself! Think of all the times you’ve been to big parties, or nicely organized events with a custom video slideshow presentation. Maybe you wondered how to create such a beautiful video using your own personal photos, slides and negatives. With our custom video production services, we can combine and incorporate any or all of your media into your custom video. Just imagine creating the perfect Family DVD slideshow that can be passed down for generations! Custom slideshows are perfect for nearly anything, from birthday parties, corporate events and even online greeting cards, such as for the holidays. If you choose to sit with our in-house editor, we can even add professional quality voice-overs to any part of your video. We’ll even send you a preview video to make sure everything is perfect before the final rendering. Contact your local DVD Your Memories editor for an appointment to create your next slideshow masterpiece!

1 36 37 38 39 40 44