Compatibility Guarantee - All Media Transferred Local

Photo Scaninning

Photo
Scanning

Slide Scaninning

Slide Scanning

Negative Scanning

Negative Scanning

Video Transfer

Video Tape Transfer

Film Transfer

Film
Transfer

Audio Transfer

Audio Transfer

Slideshows

Celebration
Videos

Latest Posts

New Blog

We’ve been very busy the last couple months handling all of your family media transfers, whether it be a VHS transfer to DVD in San Diego, San Diego Film to DVD project, or even scanning slides to digitally restore a lifetime of memories. We would like to thank all of our loyal customers and remind everyone that no matter what type of media you have, our friendly technicians are dedicated to providing you the highest quality digital transfers available.

We’ve just unveiled our new blog design, and have more in store in the coming months. Don’t forget to take advantage of our one of a kind compatibility guarantee, as we ensure every DVD we provide for you can be enjoyed hassle-free. Don’t forget that with every DVD Your Memories order, we only use the highest grade archival discs, rated to last over 100 years! If you’ve been thinking about getting a video to DVD in San Diego, or maybe a VHS to DVD in San Diego, give us a call today and preserve them forever!

VHS to DVD Transfers – Common Problems With VHS Transfers

Transferring from a VHS tape may seem easy at first glance, but many problems with VHS can arise from something as simple as a VHS to DVD Orange County transfer. Before you begin to transfer any tape, quickly inspect the tape for obvious signs of mold, dirt, cracks, splits, or anything at all that may look off about it. Even the smallest abnormalities of a VHS tape can cause major headaches when it comes time to transfer them.

Once you’ve determined that the tape is in good enough condition to be transferred, it’s time to insert the tape into the deck and begin the video transfer process. The type of deck you use can also play a large role in the success or failure of your video transfer. Most of the cheaper decks you’ll be able to find can host a variety of problems. One of the most frustrating, and hardest to remedy issues of older video tapes is bad tracking or video stabilization issues. This is often a result of aging tapes, or tapes that have been recorded from misaligned or bad recording heads. The best way to combat this sort of degradation is to obtain a deck with highly rated video stabilization or tracking features.

Once in a while, no matter what you try to do, a tape will simple not want to play correctly on a given deck, and yet it will play flawlessly on another. This is when having a backup, or secondary VCR can come in handy. If you have plans to convert a large number of tapes, especially older or important videos, it would be wise to get ahold of a secondary VCR to offset the fact that some tapes may not play on the first one you tried. This could help prevent you from having a batch of tapes that cannot be transferred.

Another common problem with older tapes can be color degradation. Often times, the colors will shift to a blue, red, and sometimes green depending on the type of tape, and how it was stored over the years. Virtually all tapes that are over ten years old will display characteristics of color degradation, at varying levels. The best way to neutralize this color shift and bring back the original colors is to rent or purchase a color correction unit, or filter that hooks up from your VCR to your monitor. These filters can greatly enhance the overall quality of your video transfers, at a marginal cost.

DVD Your Memories on San Diego Living 2/19/2010

DVD Your Memories was featured on Channel 6’s San Diego Living earlier this morning!

Watch Chuck and Brandi explain the advancements and advantages of converting your family’s media into digital formats.

Don’t forget to stop in or give us a call for all you media transferring questions!

U-Matic Video Transfer Services in San Diego

U-Matic video tape was one of the first video tape formats to be housed within a cassette, as opposed to the open reel video which was the standard at the time. Conceived by Sony in Japan, U-Matic video tapes were released in the early 1970’s. The video tape was 3/4″ in width, which is a tad thicker than the VHS, which is 1/2″ in diameter. In addition of the wider tape, it’s write speed was about twice as fast as that of a VHS tape, which provided much higher quality video recordings. Like VHS-C, U-Matic soon released a U-Matic S, which was a smaller, more compact U-Matic cassette. U-Matic tapes were generally used for production studios to archive and maintain the quality of the footage, as they had much higher quality and longevity than the standard VHS tape, and look better than a VHS to DVD transfer.

umatic to dvd

In the early 80’s U-Matic broadcast format was slowly starting to be replaced by the new Betacam video tape format, which was then replaced by HDCAM and Digital Betacam, or DigiBeta. The U-Matic format is one of the few older tape formats that has stood the test of time. After nearly four decades after it was first introduced, the U-Matic tape tape format is still used by studios to this day, although used much less nowadays. The United States Congress has a library of thousands of U-Matic tapes archived as a means of proof of copyright, or providing access copies. There are still countless U-Matic tapes in existence that are awaiting a video transfer in San Diego alone. U-Matic tapes today still deliver exceptional quality, and look great after the video transfer to DVD.

DVD Your Memories now offers U-Matic tape transfer services, check it out!

U-Matic to DVD transfer in San Diego

U-Matic to DVD transfer in Orange County

Film Transfer to DVD – Ways to Preserve 8mm Film

Years ago, the process of capturing important memories on film often meant a time-consuming and expensive process. In addition to using heavy, awkward equipment, you had to then get the film developed at a facility, and then, most of the time, you had to splice everything together onto a larger reel for continuity. On top of all this, it was also a challenge to store all of the media, while keeping in mind the potential hazards such as moisture or heat can pose to your film. Having an old box of film in your attic is one of those “out of sight, out of mind” kind of situations, where people simply don’t think about it until it’s too late. Over the years, people have slowly begun to realize that their film is not going to last forever. Unbeknownst to countless people worldwide, their precious film is suffering from severe degradation at this very second, and before long will be destroyed without them ever knowing about it which is why it’s so important to preserve 8mm film before it’s too late. Even today, thousands of people across the country are still holding onto boxes and boxes of old reels that could benefit highly from a service such as an 8mm film to DVD transfer in San Diego.

8mm film to dvd

Transferring 8mm film to dvd or hard drive is currently the best way to preserve your film, and to stop the degradation dead in it’s tracks. Typically, film transfer services will capture each individual frame directly into the lens of a broadcast quality 3-CCD camera, and then specialized software will interpolate these individual frames into a movie and remove the flickering effect, in what’s called a “frame-by-frame” film transfer process. Frame-by-frame film transfer will provide you with the highest quality film to dvd in transfer in San Diego available, often looking much better than when shown on a projector. In addition to having a smooth, seamless capture, you can now perform color enhancements and restoration or editing with video editing software, if needed. When comparing film transfer companies, be sure to always ask about the method of transfer. There are still some companies who will project your film onto a white wall or screen and simply record the image with a camcorder. The quality of this method comes nowhere close the that of a telecine transfer descibed above.

It’s often wise to have a specialized film transfer company handle the transfer of your old film. Quality telecine transfer units typically costs thousands of dollars, and for most consumers, it just isn’t worth the cost to transfer a couple thousand feet of film. However, if you do plan on transferring your film yourself, a cheaper alternative would be to project the film onto a high quality screen, and record it using a quality digital camcorder such as Digital8, MiniDV, or a Hard Drive camcorder. Just know that the results of this method simply do not compare to the quality of a frame-by-frame premium film transfer.

Here at DVD Your Memories, we use a unique retrofitted projector with a built-in manually adjustable brightness controller to adjust over and under-exposed scenes in real-time, which can provide the highest quality film to dvd in San Diego.

Next time you’re going through the old attic or closet, please keep note of the box of family memories on film in the corner, as it simply won’t be there forever!

San Diego Reel to Reel Audio Transfer Made Easy

San Diego reel to reel audio to CD services

Brief History

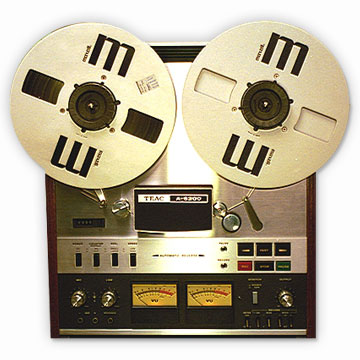
Reel to Reel audio is a form of magnetic tape audio recording in which the tape is actually held on a reel, rather than being enclosed within a cassette. The reel which holds the tape, also called the supply or feed reel, is attached to a spindle and then threaded through mechanical guides through the head assembly and then onto the empty or take-up reel. This format was commercially developed in the 1940’s by American audio engineer, Jack Mullin with financial help of Bing Crosby. Inexpensive reel-to-reel tape recorders had seen widespread use for voice recording in homes and schools until 1963, when Phillips’s audio cassette took over. Cassettes rapidly replaced reel-to-reel recorders for consumer daily use. However, the slower recording speeds, and more narrow tracks used in cassettes compromised quality.

Once professional recording studios begun using reel to reel audio, they now had several advantages which are unique to tape recordings versus phonograph recordings. Once major advantage was the fact that there was now a way to record past the 30 minute limit that phonograph records had. In addition to longer recording times, audio tape could be easily edited or manipulated in ways not possible for phonograph records. Tape editing is performed by simply cutting the tape at the required point, and reconnecting it to another portion of tape using adhesive tape, or sometimes glue. This is called a splice. Tape can also accommodate multiple tracks, allowing not just stereo recordings, but multi-track recordings too. This gives the producer of the final edit much greater flexibility, allowing a performance to be remixed long after the performance was originally recorded.

Reel to reel tape also has the option to be recorded at varying speeds. In general, the faster the tape speed, the better the sound quality will be. In addition to faithfully recording higher frequencies and increasing the magnetic signal strength, higher tape speeds spread the signal longitudinally over more tape area, reducing the effects of damage or defects in the tape. Slower speeds will help to conserve tape and are useful in situations where sound quality is not as crucial.

Tape Speeds

15/16ths of an inch per second (in/s) or 2.38 cm/s — used for very long-duration recordings (e.g. recording a radio station’s entire output in case of complaints, aka “logging”)
1? in/s or 4.76 cm/s — usually the slowest domestic speed, best for long duration speech recordings
3¾ in/s or 9.52 cm/s — common domestic speed, used on most single-speed domestic machines, reasonable quality for speech and off-air radio recordings
7½ in/s or 19.05 cm/s — highest domestic speed, also slowest professional; used by most radio stations for “dubs”, copies of commercial announcements; Through the early-mid 90’s many stations could not handle 15 IPS.
15 in/s or 38.1 cm/s — professional music recording and radio programming
30 in/s or 76.2 cm/s — used where the best possible treble response is demanded, e.g., many classical music recordings

Transfer Process

Transferring reel to Reel audio can be sometimes be much trickier than it seems. Due to the fact that the tape could have been recorded in a variety of speeds, makes it difficult to initially assess it’s length. If the tape or reel is not marked with what speed it was recorded on, the only way to find out is to load it on the machine and run it. Typically, from my experience with audio transfer in San Diego, most home audio recordings were recorded at 3¾ speed, so it’s best to start there first. Once you have determined the correct speed of the tape, you also want to make sure the tape is loaded correctly onto the reel. Sometimes when people have finished listening to a reel, instead of rewinding, they will leave it on the takeup reel, which if played from that, could result in backwards audio.

Reel to reel audio can also have multiple tracks on one side of the tape. One easy way to determine this is to just set the player to play both tracks at once, or stereo, so you can easily tell if the tracks are the same or not. If a reel is not stereo and has multiple tracks, you must either play the reel back again over the other track, or record in stereo and manually split them up in an editing program afterwards. After you decide the reel is ready to be transferred, load the reel onto the player and ensure that the audio out plugs from the reel to reel recorder are connected to your Line-in on your computer. All that is left to do is play the reel and hit record on your audio capture program and you are now well on your way to preserve and enjoy your old reel to reel audio in San Diego.

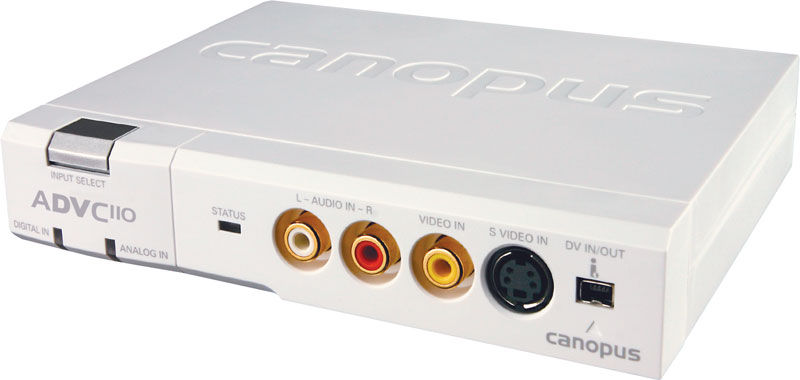
How to Capture Video using Canopus ADVC110

There are many things to think about concerning video transfer in San Diego. Most of us have home video tapes of various people or events that have transpired throughout our lives. Home movies are a great tool to use for social events such as a get-together, holidays, or a nice weekend family night. Nowadays, however, most of the equipment used to record and playback these video tapes have become obsolete and are no longer being produced, which can render much of your home videos unplayable once your equipment fails. When deciding what to do with all of your analog video tapes, take some time to consider the fact that video tapes will not last forever, nor were they designed as such. Tape degradation is a common issue with older Video tapes, or tapes not stored properly. With a little bit of knowledge and time, you can easily revitalize these older tapes with some editing to create a perfect video to dvd transfer using awesome new technological products such as the Canopus ADVC110.

In the early days of video recording, editing your home videos was quite a chore, and often took lots of time and patience. Technology has now reached a point where you can simply push play on your recorder, click your mouse, and have your entire video captured onto your computer’s hard drive. This advancement now allows the average consumer to record, edit, and produce studio-quality footage, from the comfort of their own home or office. Now instead of using a video production studio to create your next promo video, or family slideshow, you can now do these projects on your own time, budget, and specifications, using a Canopus ADVC110.


Once your Canopus is connected to your computer via firewire cable, and you’ve obtained a VCR or camcorder with RCA or DV cables, and video capture software, you are nearly ready to start capturing video . To begin the process, connect your VCR or Cam to the Canopus with the RCA cables. After this, open your video capture software, and in the options, set the capture folder up so you know where the video will be once recording has finished.  If you plan to do other tasks on your machine as it’s capturing, it’s recommended that you set the priority of your video capture software to “high”. You can do this bringing up the task manager by pushing Ctrl+Alt+Delete Select, find your video capture software on the list, right click it, and select process priority high. Next, take the tape you would like to have transferred and ensure it is fully rewound. Visually inspect the tape to make sure it’s free of mold, dirt, or other debris, then insert it into the tape player.

All that’s now left to do is to hit play on your tape player, and as soon as the video begins, click the start capture button on your video capture software. If everything went smoothly, you should see your video playing in the preview window of your video capture software, as it is being captured. Once your video tape is over, stop the capture, and in the source folder, you will find your new captured AVI video file, which is ready to be edited or converted to any form of video you choose. More and more people are realizing the ease and flexibility of virtually uncompressed AVI files, as opposed to the standard San Diego VHS to DVD transfer.

1 40 41 42 43 44