Compatibility Guarantee - All Media Transferred Local

Photo Scaninning

Photo
Scanning

Slide Scaninning

Slide Scanning

Negative Scanning

Negative Scanning

Video Transfer

Video Tape Transfer

Film Transfer

Film
Transfer

Audio Transfer

Audio Transfer

Slideshows

Celebration
Videos

Latest Posts

How to Fix Muffled Audio When Transferring Audio to CD

As time goes on, our old analog recordings continue to degrade day by day and little by little and soon will turn into muffled audio, or even worse. What once was a audio track full of crystal clear sounds had been transformed into a muffled inaudible mess once you transfer the cassette to CD. This same thing happens all of the time to countless people’s priceless recordings. A large problem with the early VHS tapes was that they were all in mono sound. Even through the early 1990s many VCRs used mono sound as the recording standard, especially the low budget models. Mono sound, at least on VCR recordings, tends to have a much lower tonal depth. Much different than the Dolby Digital Surround sound we rely on today. These problems are also found on older homemade vinyl and cassette recordings.

audio restoration los angeles

The muffling effect is due to degradation in the form of losing the higher frequency sound data, which leaves the middle and lower frequencies much more pronounced. The easiest way to do this is to use an audio editing program to make the adjustments for you. For much older audio, it can be impossible to restore audio it back to it’s original state, but with a little bit of work, you can make it sound a whole lot better.

One audio program I like to use, is Audacity. It’s free and is actually a very powerful little audio editor that can help fix muffled audio. The first step to fixing up the audio is to open up the audio file and open up your equalizer. From here, it’s really a matter of playing around with the equalizer to achieve the best results. For starters, try raising the upper frequency sounds slightly, and decrease the low end. This will hopefully create more of a balanced sound in the recording. If your audio has varying levels of volume, there is a neat tool called normalize, which will create a constant volume throughout the recording.

Check out our services below for expert local technicians:

Audio Restoration Los Angeles – Our Culver City / Los Angeles store
Audio Restoration Orange County – Our Irvine / Orange County store
Audio Restoration San Diego – Our Kearny Mesa / San Diego store
Audio Restoration Denver – Our Denver store

8mm to DVD Los Angeles

Near the Los Angeles or Culver City area? If so, did you know that converting your 8mm to DVD was right in your neighborhood? DVD Your Memories is now serving Los Angeles county and helping our newest customers transfer their precious memories recorded on film, video, audio and images. We actually specialize in transferring this type of media and we use dedicated technicians for each type of order! For pricing and additional info about the film to DVD transfer process: 8mm to DVD Los Angeles Super 8 to DVD Los Angeles 16mm to DVD Los Angeles 8mm film is an older type of media that is still taking up room in many closets. Due to the nature of 8mm film, and the material it’s composed of, the images stored will not last forever, and depending on how it was stored, it could be at an advanced stage of decomposition. When it comes to precious memories such as your families archive of 8mm film, or 16mm film, you now have the option to digitally transfer these home movies to archival quality DVDs with our 8mm to DVD services, or put them onto an external hard drive. Over the years, film such as 8mm or 16mm will actually color-shift generally to either blue, purple, or magenta, depending on the material of the film. With the premium film transfer, you can have your film completely restored to it’s original colors, and make sure that your under and over-exposed scenes are corrected in real time. Take a look below for a couple of examples of some restoration work on some of our 8mm to DVD Los Angeles transfers. The Premium film transfer is by far the highest quality film transfer available today, as each full frame of film is individually transferred one after another. Our retrofitted projector is one of the few in the world that has a manually adjustable brightness control which can make under or overexposed scenes look much better. We use this machine for both 8mm to DVD Los Angeles, and Los Angeles Super8 to DVD orders. The transfer technician will watch your film on a standard monitor as well as a waveform monitor and adjust the back-light brightness accordingly. This type of brightness adjustment is a custom fitted attachment, and is not available at most other companies. With a frame-by-frame transfer, you are then easily able to manipulate the film once it’s been captured to your computer.

Convert iPhone Movies to DVD

A while ago, I wrote about how you can transfer your family movies on VHS to iPhone or iPod. Smartphones of today are getting extremely technologically advanced. For something that fits in the palm of your hand, it can do an extraordinary amount of tasks, and do them well. Capturing priceless moments using the built in camcorder is no exception.

For this guide, I’ll be detailing how you can convert your recorded iPhone videos to dvd and transfer them onto your computer. For starters, you’ll need your iPhone of course, as well as a data transfer USB cable and a working version of iTunes. The first step is to connect your iPhone to your computer using the data transfer/USB cable. Ensure the drivers are all loaded properly. Click on your start button, then click on My Computer. You should see your device showing up as a hard disk drive on your computer. Double click the icon, and you will now be in a root directory full of all the photos and videos you’ve shot with your phone. Simply drag and drop the videos or photos from the phone and place them wherever you’d like.

Be default, your videos will likely be in MP4 format, which is not the correct format for placing onto a DVD movie. To rectify this, you’ll need to convert the video to an MPEG2 video, which you can find out how to do in the next guide, How to convert video files to MPEG2 format. However, many modern software companies will include a built in video to dvd conversion process right into the program. So, likely, all you’ll need to do is open your DVD burning software, select the files you’d like to burn onto a DVD, and then just hitting burn and let the conversion happen.

Need help? Give one of our stores a call!

We have offices that can handle iPhone video to DVD in Los Angeles, Orange County and San Diego!

How to Cut Out Commercials from a Television Recording

So you face the problem of having to cut out commercials or other unwanted material from your recorded TV. Historically, this has been pretty tough to do. Even with the advent of modern DVRs and video recorders, they aren’t perfect at detecting scene changes, or where commercials begin and end. In the old days, you either had to sit there and pause the recording over the commercials, or fast forward through them when it comes time to watch it. However, isn’t it more convenient to simply cut them out entirely? This is especially true if you plan to send out the video as gifts to friends or family.

People will record television shows that has some sort of meaning to them. Either they were on the show themselves, their family was, or the show contained subject matter of great importance. The process of eliminating commercials isn’t a quick process, but it will make your video much easier to watch without fumbling through the fast-forward button. The most sure-fire way to accomplish this task is to convert your video to a format that can be edited through the computer. If the video is on a video tape, you’ll need a video tape to hard drive transfer. Once the video capture has completed, the raw video file will now be placed onto your computer’s hard drive.

Once the video file is on the hard drive, you can begin to edit out the commercials. The easiest way to accomplish this would be to load the video onto a video editing platform, and run through the timeline and mark where each commercial begins and ends. You can then use these marks to easily delete the portions of video you do not want to keep. Once the editing has been completed, simply re-render the video into the format you’d like. If burning to a DVD, render it to an mpeg-2 file for easy burning with most DVD authoring programs.

Having trouble? We convert video to hard drive in Los Angeles and video to DVD in Los Angeles, San Diego & Irvine. Come stop by and DVD Your Memories!

Amazing VCR Collection

When we transfer VHS to DVD in Los Angeles, San Diego & Irvine we come across a fair share of VCRs and old video players. Oddly enough, these obsolete machines are a premium collectors item for at least one person. The impressiveness of his bowlcut is only overshadowed by his slightly more impressive VCR collection.

Although he never states why, when, or how he came to collect all of these VCRs, this fully edited video presentation of his collection suggests he is quite dedicated to the technology. It would appear the man favors the Panasonic models of VCR.

Camcorder Shooting Tips, Creating Perfect Home Movies

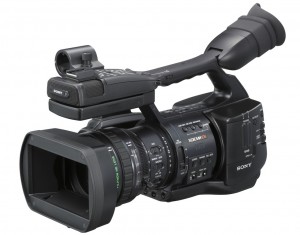
There’s a first time for everything, and shooting video with a camcorder is no exception. When you first handle the camera, it can be intimidating, especially if you have no idea what the multiple knobs and switches are for. When shooting important events, it’s important to have a solid understanding of the underlying mechanics of shooting video. Don’t expect Hollywood quality shots, but over time, you’ll realize how to properly shoot video. This guide will serve as a starting point so that your videos aren’t completely unwatchable.

Camcorder to DVD

If you plan to shoot while remaining stationary, you should consider using a tripod, or other method of keeping the camera still during the recording process. The lack of a tripod will often result in shaky video that can often give viewers headaches or even motion sickness.

Go easy on the zoom. If one thing is common with amateur video, it’s the fact that everyone loves the zoom button. Overuse of the zoom feature will usually leave your user dizzy or disoriented. Zoom does have it’s placed when used properly, and can add a great effect to your video. Try to never zoom when you don’t need to. Instead, try to move closer to the object your attempting to film. If you physically cannot move any closer, use the zoom button lightly and slowly to prevent fast-jerking motions with the camcorder. Also if your camcorder features “digital zoom”, try to avoid that as much as possible, as it isn’t a true zoom. The camera tries to fake pixels, which end up making the image distorted and unpleasant to look at. Remember that some day you might want to transfer the tape to DVD in San Diego to hand out to family and friends!

Try to take it easy on the wide shots. While wide-shots are great for the introduction of the setting you’re in, consistant wide, long shots can be distracting, and it’s often better to focus in on the details around you to give the viewer a better grasp of what’s going on.

Another trick to make your shooting more appealing is to move around when you are recording. This is great for sports games as you can move to different parts of the field periodically to give the viewer multiple angles of the playing field. Use the bleachers and surrounding terrain to your advantage for high and low shots.

Camcorders often have built-in special effects such as night vision or sepia tone filters. Try to avoid using these features unless absolutely necessary. Watching a sequence with several different effects blasted through it can be strange, and even frustrating to watch. Make sure the nightvision is turned off during the daytime shots! Special effects are often best added during post-production with the use of video editing software.

Video to DVD Los Angeles

Record the most important moments. If you’re using a camera with limited capacity of memory or tape, you should focus on capturing the most important moments of the event your recording. The last thing you want to happen is running out of tape or hard drive space at the grand finale! Always bring a backup memory card or tape just in case this does happen. If you’re camcorder is battery operated, invest in a second battery just in case you forget to charge it, or it runs out of juice in the middle of the shot.

Use widescreen shooting to your advantage. If you’re an owner of a widescreen or HDTV, be sure you’re shooting your footage in the widescreen format. Most newish models of camcorders offer to record at 4:3 or 16:9 aspect ratio to provide the best viewing experience.

Using these tips will help to alleviate some of the common woes of first-time camcorder use. Through experience you’ll start to realize what works and looks the best. Over time, you may even want to edit and transfer your video to DVD. We’re experienced in handling all kinds of video transfer services including Camcorder to DVD in Los Angeles, San Diego, and Orange County.

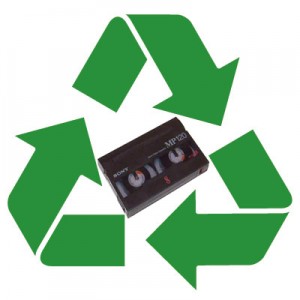
Where to Recycle Video Tapes and Other Old Media

One of the most important, yet least known facts about electronic waste (e-waste) is that it is the fastest growing solid waste stream in the United States. Even though it accounts for less than two percent of the waste in landfills, e-waste is responsible for over ninety percent of landfill pollution. That is why, in 2003, the State of California banned electronics from being dumped into our landfills. In 2006, Recycle San Diego was created to properly collect and recycle unused and unwanted electronics. E-waste must be handled carefully and have additional stages of processing in order to reduce the components into their most basic state for re-use. Therefor, unlike recycling cans, bottles, and paper, there is a charge for this service.

One of the many organizations accepting video tape donations is ACT (Alternative Community Training). ACT is a non-profit organization which specializes in recycling older video tapes. This is one place where you can recycle video tapes knowing that they will help a worthy cause. The organization recycles donated video tapes and resells them to the public. In addition to providing new job opportunities in your community, you can also help make a huge difference by limiting what gets stuffed in landfills! Don’t let your tapes go to Mirimar Landfill! For example, video tape recycling is perfect after going through our VHS to DVD Los Angeles conversions.

For an home movies, and other recorded tapes not fit for resale, we recommend contacting E-Cycle Environmental or Green Disk for alternative recycling solutions. Also don’t hesitate to contact your local recycling center, and see if they have any sort of programs that you could benefit from.

As always, we strongly suggest that you keep your original media until you are absolutely sure you no longer have a use for it. When you’re ready to part with it, bring it on by! Also if you have performed photo scanning Los Angeles, slide scanning Los Angeles, or cassette to cd transfers, many places will take this media as well.

1 32 33 34 35 36 44