Compatibility Guarantee - All Media Transferred Local

Photo Scaninning

Photo
Scanning

Slide Scaninning

Slide Scanning

Negative Scanning

Negative Scanning

Video Transfer

Video Tape Transfer

Film Transfer

Film
Transfer

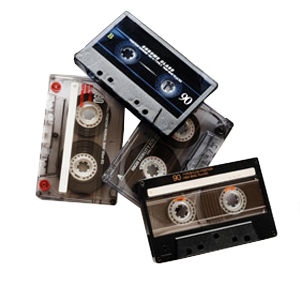
Audio Transfer

Audio Transfer

Slideshows

Celebration
Videos

Latest Posts

Google Shuts Down Newspaper Archival Scanning Project

Google has recently shut down it’s newspaper archival scanning program aimed to make the world’s newspaper archives accessible and searchable in an online format. The project was started in 2008 as a joint effort between Google, ProQuest, and Heritage to begin scanning newspapers of the country’s top newspaper publication’s archives. They aimed to make the newspapers both searchable and browsable exactly as it had appeared in print. The digitization process included photographs, headlines, articles and advertisements. Since 2008, the current digitized material stands at around 2,000 different publications dating back to the 19th century. According to the Boston Phoenix, Google emailed its contributing partners Thursday to notify them that the initiative was coming to a close so that the company could redirect resources to “newer projects that help the industry, such as Google One Pass, a platform that enables publishers to sell content and subscriptions directly from their own sites.” Although Google will no longer process any more media to be digitized, publishers are encouraged to add material to their archives via sitemaps. Newspaper Scanning in San Diego, Irvine, and Los Angeles is a service that DVD Your Memories provides to our customers who are looking to save important articles. Read more about it here

Organizing Your Digital Photos – Top Digital Photo Organizers

Organizing your photo collection can seem like a daunting task. Especially if faced with thousands upon thousands of images taken over the years. Luckily, there are several computer programs that can help do this for us, with relative ease. Digital photo organizers have been around for a while, and really started to gain popularity within the last couple years, especially with people who are now going through their older media and scanning slides, negatives and old photos.

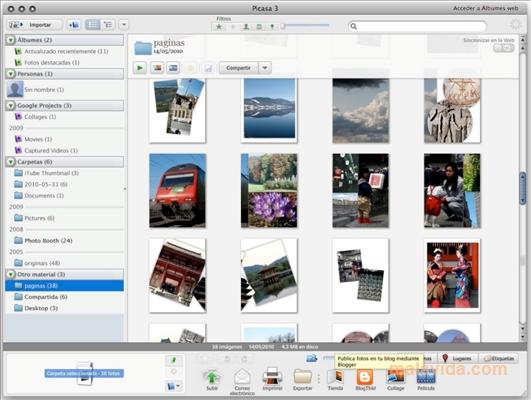
Picasa

Picasa is a simple, yet effective photo manager. Originally developed by Idealab in 2002, it was purchased shortly after by Google in 2004. Since then, it’s grown as a premier photo manager with a large user base. With Picasa, it’s possible to organize and search for your photos in a variety of different ways. For starters, Picasa utilizes a folder manager, which allows you to import photos from all around your computer into Picasa, without moving the original photos out of their existing directories. You can of course do the standard such as name the photos individually, place them into folders, as well as new ways of photo sorting such as facial recognition, keyword tags, geotagging, and photo collections. Picasa is free download as well, making it a top choice for many people worldwide.

Picasa also has a built in image editor called Pic Nic, which will allow you to make edits to your photos for common ailments such as color adjustments, contrast, red-eye fix, and cropping.

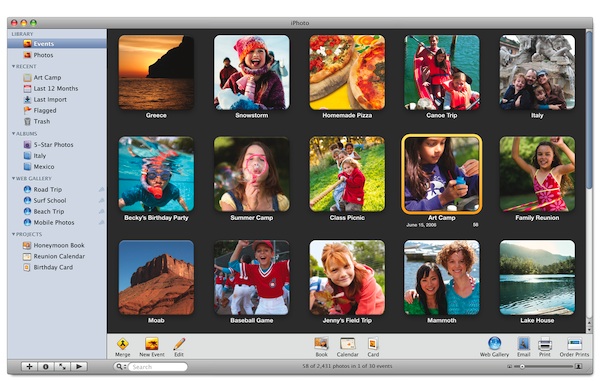
iPhoto

For Mac users, iPhoto will be a familiar program, as it’s bundled software included with every new Mac purchase. iPhoto is a great photo organizational tool, with many different appealing features. A lot of the magic happens behind the scenes, as iPhoto will use advanced techniques to store your photos using an automatic import tool. Like Picasa, iPhoto has a variety of different image manipulation and editing features designed to enhance your existing collection. The overall usability, look, and it’s seamless integration into existing apple products and software make it a top pick for Mac users.

Photo organizers are great for when you first begin scanning your photos to your computer, and need a neat way to view them at any time. Try one out!

Recent Sponsoring by DVD Your Memories

It’s been another busy couple for DVD Your Memories! Amidst all of the memory transfers happening at our local stores, we’ve also been busy sponsoring local charities and events around southern California. We’re committed to providing local families with high quality media transferring service, as well as helping our community when we can.

Girls Think Tank Auction – Girls Think Tank’s mission is to inspire, empower, and organize our community to advance basic human dignity. We view basic dignity as universal human rights, including access to basic needs and the right to be free from violence, exploitation and discrimination. DVD Your Memories donated a gift certificate worth $150 that can be used on any of our media transfer services!

Twin Trails Education Foundation – is Sundance’s Partner in Education. We are a group of parents, family members, and businesses that provide financial support to supplement and enhance the education and development of our students. Our school depends on your donations to the Foundation to help fill in the gaps in the school’s budget. DVD Your Memories had donated a $100 gift certificate that can be used on any of our media transfer services for their charity auction event!

Congregation at Beth Am – Since 1982, Congregation Beth Am, House of the People, has maintained a rich tradition in the spirit of Dor L”Dor (generation to generation). As a Conservative synagogue, we serve congregants from varied and diverse backgrounds. Beth Am provides a variety of religious services and a full spectrum of educational and social programs. Led by Rabbi David Kornberg and Assistant Rabbi Matthew Earne, Congregation Beth Am offers many opportunities to participate in Shabbat, Hugim (holidays) and Holy Days services. DVD Your Memories has donated a $125 gift certificate, good for any of our services including video to dvd, film to dvd, and image scanning!!

Video Tape Water Damage

Unfortunately, video tapes can be damaged in a variety of different ways, such as water damage. Water damage or exposure to video tapes is a fairly common type of tape damage.

Homes that have been flooded will often have the problem of water getting into their video tapes, sometimes the tapes having been submerged for a period of time. This can cause a variety of different issues including equipment damage if played before taking care of the water problem. The good news is that temporary exposure to water does not mean the end of your tape. Often times, data can still be extracted from the tape if caught quick enough. Older analog tapes generally will have a better survivability rate than the newer digital tapes such as Mini DV tapes.

If you’re tapes have been exposed to water or moisture, here are some things to keep in mind:

Do not attempt to play wet tapes in your VCR! Attempting to play wet or damp tapes can cause permanent damage to both the tape and your equipment. While these tapes can be rescued with proper handling and care, playing them prematurely can cause irreversible damage to your tape.

If you discover your tapes have been exposed to water or moisture, time is off the essence! Tapes are very resilient to brief exposure, but will soon deteriorate if left alone! It is best to tackle the problem immediately upon discovery, and to transfer the tapes to DVD or another digital format as soon as possible. We advise taking them to experienced video tape repair centers. However, if you plan to tackle the problem yourself make sure to act quickly. If the tapes have been exposed to water with known contaminants in the water, it is advised to submerge the tapes into distilled water to rinse the contaminants off of the tape. Only rinse in distilled water if the tapes are still wet, if they have dried already it’s best to not wet them again. Common water contaminants including sewage, chlorine, or salt.

To dry your tapes out after being exposed, do not use any method involving heat to dry them out such as hair dryers. Heat will cause the tape to warp, and in doing so will cause permanent damage. The most effective way to dry the tapes out is to take the reels of tape out of the cassette and place them in a cool location out of sunlight that has a constant air flow. A large fan placed in the room will help with air circulation. If you need assistance in taking your video tape apart, check out our video tape repair guide.

We have repaired many tapes that have been exposed to water damage. If you need assistance, please come visit one of our local stores and inquire about tape repair services.

Video Won’t Play on Your Computer? Try VLC

Video can come in a variety of different codecs, formats and containers. You’ve probably even heard of some of them such as MPG, MOV, AVI, Quicktime, Real Player, WMV, FLV, MP4, and the list goes on and on. However, what happens when your computer refuses to play one of these video types or gives you the “Unknown format type” or “Format not supported” messaging? You might try Googling the problem, only to be led on a wild goose chase downloading several questionable shareware type players, with no real results.

So, what are your options for playing your entire media collection?

VLC Media Player is a free, open-source, media player that is incredible adept at playing ALL sorts of media including BluRay/DVD viewing, music listening or online video streaming. VLC will even attempt to play corrupted video files that other players refuse to open. We’ve recommended VLC to several of our own customers who have had video to hard drive transfers, who’ve reported positive results as well. If you want a video and media player on your computer that simply plays everything you throw at it, look no further than VLC.

VLC supports nearly every major operating system with downloadable versions for Windows, Mac OS and Linux based systems.

Image Scanning Quick Guide

This is a series of charts that was put together to help you organize your image scanning job. These charts should provide some insight that will be helpful to your planning your image scanning.

Photo Scanning Reference Chart – The chart below will show you the resulting pixel and file sizes from your photo scanning, as well as the max print size you can create from your scans.

Size Output 300 DPI Output 600 DPI Max Print Size Output File Size JPEG 300 DPI Output File Size JPEG 600 DPI Output File Size TIFF 300 DPI Output File Size TIFF 600 DPI
2×3 600×900 1200×1800 4×6 0.6 MB 2 MB 2 MB 7 MB
3×5 900×1500 1800×3000 6×10 1 MB 4 MB 4 MB 15 MB
4×6 1200×1800 2400×3600 8×12 2 MB 7 MB 6 MB 25 MB
5×7 1500×2100 3000×4200 10×14 3 MB 12 MB 11 MB 49 MB
8×10 2400×3000 4800×6000 16×20 6 MB 20 MB 14 MB 75 MB
11×14 3300×4200 6600×8400 22×28 13 MB 40 MB 50 MB 150 MB

The chart below will show you how many photos will fit on one of our 100-year archival DVDs.

Size JPEG 300 DPI JPEG 600 DPI TIFF 300 DPI TIFF 600 DPI
2×3 7440 2230 2230 635
3×5 4460 1110 1110 295
4×6 2230 630 740 175
5×7 1480 370 400 90
8×10 740 220 315 55
11×14 340 110 85 25

Negatives/Slide Scanning Reference Chart – The chart below will show you the resulting pixel and file sizes from your slide scanning and negative scanning, as well as the max print size you can create from your scans.

Format Output 2000 DPI Output 3000 DPI Output 4000 DPI Max Print Size 2000 DPI Max Print Size 3000 DPI Max Print Size 4000 DPI
35mm 1400×2500 2550×3750 3400×5000 4×7 8×12 10×15
110 1000×1300 1500×1950 2000×2600 3×4 4×6 5×7
126 2000×2000 3000×3000 4000×4000 5×5 9×9 12×12
127 Super 2800×2800 4200×4200 5600×5600 8×8 13×13 17×17
120 small 3200×4200 4800×6300 6400×8400 9×13 16×20 20×27
120 large 4200×5500 6300×8250 8400×11000 13×17 21×26 27×35
3D/Disc 1500×1700 2250×2550 3000×3400 4×4 7×8 9×10

Slide/Negative Scanning Output File Sizes – The chart below will show you the resulting file sizes from your slide and negative scans.

Format File Size JPEG 2000 DPI File Size TIFF 2000 DPI File Size JPEG 3000 DPI File Size TIFF 3000 DPI File Size JPEG 4000 DPI File Size TIFF 4000 DPI
35mm 6 MB 14 MB 14 MB 30 MB 25 MB 55 MB
110 2 MB 4 MB 5 MB 9 MB 8 MB 15 MB
126 6 MB 12 MB 13 MB 26 MB 23 MB 46 MB
127 Super 12 MB 23 MB 26 MB 51 MB 45 MB 90 MB
120 small 20 MB 39 MB 44 MB 87 MB 77 MB 154 MB
120 large 34 MB 67 MB 75 MB 149 MB 133 MB 265 MB
3D/Disc 4 MB 8 MB 9 MB 17 MB 15 MB 30 MB

The chart below will show you the number of scanned Slides/Negatives that fit on a DVD.

Format JPEG 2000 DPI TIFF 2000 DPI JPEG 3000 DPI TIFF 3000 DPI JPEG 4000 DPI TIFF 4000 DPI
35mm 740 315 315 145 175 80
110 2230 1115 890 495 555 295
126 740 370 340 170 190 95
127 Super 370 190 170 85 95 45
120 small 220 110 100 50 55 25
120 large 130 65 55 28 30 15
3D/Disc 1115 550 495 260 295 145

Watch MiniDV Tapes On Your TV or Computer, a Quick Guide

Watch MiniDV Tapes on TV or Computer

What Are MiniDV Tapes?

Simply put, MiniDV Tapes were Sony and Panasonic’s answer to the limitations of VHS. The VHS Tapes that people were using in their large camcorders were bulky and unwieldy, and people wanted a more convenient and mobile solution. The MiniDV answered that call. Being smaller than the VHS, the MiniDV was far easier to use to make home movies with, and it even had a brief moment of popularity amongst journalists. A small camcorder that fit a MiniDV tape was surely more convenient in the field than the unwieldy VHS one! It was far easier to record on and watch MiniDV, and for a while it was a very popular way of making home movies. The popularity of the format was short lived though, as digital formats came into popular use soon after the MiniDV was released.

Difficulties in Watching MiniDV Tapes

MiniDV tapes are a great format to record onto, but what about when you want to watch MiniDV tapes on your TV or computer? This can sometimes be a challenge. Mini DV tapes require a player or a camcorder that is compatible to record or play MiniDV cassette tapes. This means that you will not be able to play these types of tapes on your home VCR, or television without either digitizing them, or transferring the video off of the tape, or playing the tape from the camcorder itself. We’re often asked if there is any sort of MiniDV conversion device that you can use with MiniDV tapes that will allow you to view them on your VCR or other home media player, without the hassle of trying to track down a working camcorder and unfortunately, there is no such thing available.

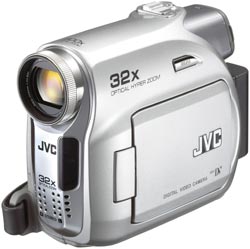
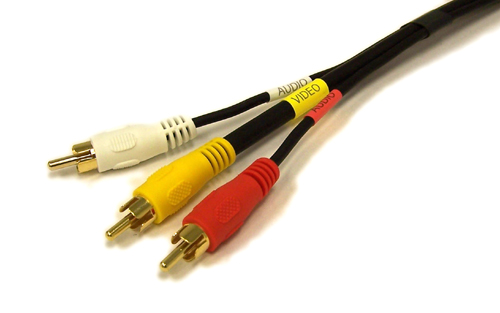
The only way to watch MiniDV tapes on your television is to hook up a camcorder to your TV using the audio/video cables that were bundled with your camcorder. You could also hook up the camcorder in a similar fashion to your computer and use a video capture program to record the video stream onto your computer’s hard drive.

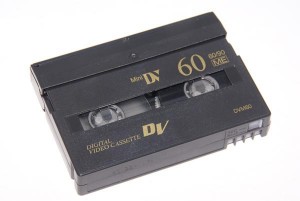
MiniDV Tape

MiniDV Tape Player

Connecting up your Camcorder

Before you do anything else, look at your Mini DV Camcorder or Mini DV player and make sure everything is working properly. You can try a blank tape in there and try the rewind, fast forward, pause, play, and eject buttons. You don’t want to be trying to troubleshoot a camcorder while valuable memories are in there! If you want to skip messing around with RCA Cables, check the method that doesn’t use them.

No RCA – Try This First!

Check if your MiniDV Camcorder has a DV Out output (it looks like a rectangle with a bite taken out of it) – if it has one, you can plug one end of an DV Out/Firewire cable into it and the other end into your TV. The other end of that cable should be a firewire input. If you can’t find that cable, you can buy one here for very cheap. A lot of TVs will have a fire wire input, but if not, you can get a firewire to HDMI adapter and connect it up that way. You should be able to hit play on your camcorder and turn your TV to the appropriate HDMI input and then view your tapes to your heart’s content that way.

RCA – This Works Too!

The other method of connecting your camcorder to the television is actually pretty simple. The first step is to obtain your camcorder’s RCA cables (these are the yellow/red/white cables you’d often find connected to other components in your home theater). Now, you need to be extra careful here and make sure you get the right type of cable. Some camcorders have odd connectors or even proprietary connections that require an RCA cable from the manufacturer. The good news is that most of the time, camcorders will supply you with the cable, so that you can easily connect to your home TV for future viewing. So, once you determine which RCA cables you need, it’s time to get connected.

Plug the cables into an open input port on your TV. Keep note of which input you connected them to so that you can switch over to that input using your remote control, or television settings. (If you plugged the camcorder into Input 3, you’ll need to switch your TV to input 3 in order to get the signal.) With proper connection, you should now see on your TV exactly what you’d see by looking through your viewfinder. Now, all that’s needed is to just press PLAY on your camcorder, and you can watch MiniDV tapes to your heart’s content.

Viewing with a Mini DV Tape Deck

To be honest, this method is overkill. Most people will have a MiniDV Camcorder laying around somewhere anyway, and the picture you get using a tape deck probably isn’t going to be materially better. Mini cassette video players use the same cleaning tapes as a MiniDV camcorder does, so they get cleaned the same way. When doing MiniDV to digital transfers, we just use the camcorder. If you really do want to use a tape deck, though, the Sony DSR-20 is a good one. As an added bonus, you can view and digitize from DVCam tapes using that equipment, too. To turn camcorder tapes to digital, this piece of equipment is pretty useful, it’s just expensive. The only drawback is that it won’t take Hi8 or Digital8 tapes – for a list of camcorders that can handle Hi8, Digital8, or 8mm tapes, you can look atthis convenient list.

Digital Transfers to Watch MiniDV Tapes

If you are unable to find a camcorder to watch MiniDV tapes, you always have the option to transfer the MiniDV tapes to digital in any one of our four locations for even more convenient viewing! Digital files last forever and don’t degrade with every single play or rewind.

1 30 31 32 33 34 44