Compatibility Guarantee - All Media Transferred Local

Photo Scaninning

Photo
Scanning

Slide Scaninning

Slide Scanning

Negative Scanning

Negative Scanning

Video Transfer

Video Tape Transfer

Film Transfer

Film
Transfer

Audio Transfer

Audio Transfer

Slideshows

Celebration
Videos

Latest Posts

The Difference Between NTSC and PAL

If you have relatives overseas, or have ever received video tapes from Europe or Asia, you may have found that the tapes did not play correctly in your home VCR. This is caused by a significant difference in broadcasting formats between NTSC and PAL. Here in America, we use NTSC, which is short for National Television Standards Committee. Other regions, such as Europe, Australia, and some of Asia use a format called PAL, or phase alternating line. Typically, you’d notice black and white bars and fuzz mixed with garbled audio when trying to play a PAL tape on a NTSC VCR and at first glance you man even mistake it for VHS repair job while thinking it’s tape damage.

If you have ever traveled to another region like Europe, you may have noticed that some of their equipment is a little different than ours here in America. In Europe and other countries, they use a 50hz power supply. Because of this, on PAL systems the video signal is sent out at 50 fields per second, or 25 alternating lines. Doing the math, you can easily figure out that PAL video runs at 25 frames per second. In America, we use a 60hz power supply which allows the image to be sent at 30 alternating lines. This allows NTSC video to run at right around 30 frames per second.

This is the reason that converting PAL to NTSC and vice versa is a little tricky, and makes the video seem a little funny when completed. When converting from PAL to NTSC, 5 frames must be inserted into the footage to compensate for the 5 missing frames per second that the PAL format lacks. When these frames are artificially added to the video, it can result in the video looking jerky and create a slight speed increase in the video playback. The opposite is true if converting an NTSC video to a PAL. Instead of adding 5 frames, you will actually be removing 5 frames from the video, which in the end makes the video appear unnaturally slow.

In addition to the framerate difference, there is also a difference in the video resolution. NTSC displays 525 lines, while PAL actually displays 625. With more lines, you get more video information on the screen which then equates to better overall picture quality. When an NTSC video tape is converted to PAL, often times black bars are sometimes used to compensate for the smaller screen aspect.

Recent Sponsoring by DVD Your Memories – June Edition

Hello everyone!

The Old Globe Theatre Guilder’s Silent Auction and Fashion Show is fast approaching on July 15! DVD Your Memories has donated some awesome prizes and gifts to be auctioned off during this event. Each year, the Globe Guilders Fashion Show raises much needed funds to support The Old Globe’s Artistic, Education and Community Programs. The Guilders are thrilled to announce that world-renowned designer Naeem Khan will return this year to present his Fall 2011 line. Stop on by and don’t forget to bid for a chance to capture your old memories such as VHS on DVD!

DVD Your Memories has also helped out the Adopt-A-Classroom program by giving cash donations to the program this month. Adopt-A-Classroom increases opportunity for student success by empowering teachers with community partners and funds to purchase resources for the classroom.

Camp Quest also received a donation to help with their summer activities and programs throughout the country. The purpose of Camp Quest is to provide children of freethinking parents a residential summer camp dedicated to improving the human condition through rational inquiry, critical and creative thinking, scientific method, self-respect, ethics, competency, democracy and free speech.

Types of Video Tapes: A Quick Guide

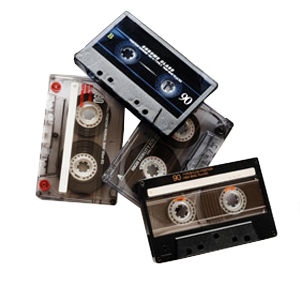
Video tapes can come in many different formats. Some large, some small. Some are capable of holding hours and hours of footage, some can hold merely 20 minutes. Trying to figure out what each tape is, and how much it holds can be a time consuming process. Below is a guide on the different types of video tapes which you might find helpful if prepping for a video to DVD or a video to hard drive transfer.

MiniDVD MiniDVD to DVD ~20 Minutes per side
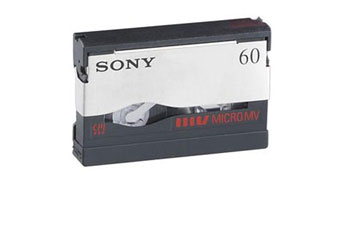
MicroMV MicroMV to DVD 60 minutes
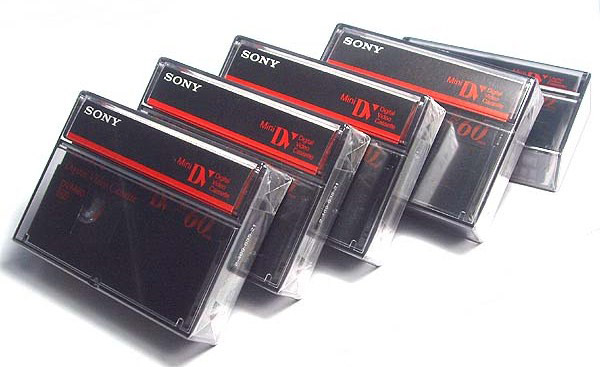
MiniDV MiniDV to DVD 60 minutes (Stantard)
90 minutes (Extended)
Video8, Hi8, Digital8 Hi8 to DVD 120 minutes (Standard)
240 minutes (Extended)
VHS-C VHS-C to DVD 30 minutes (Standard)
90 minutes (Extended)
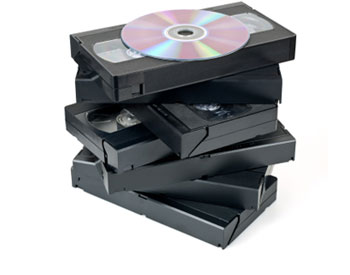
VHS VHS to DVD 2 hours (Standard)
6-8 hours (Extended)
Betamax Betamax to DVD 60 minutes (Standard)
3/4″ U-Matic Varies (Running time stamped on tape)
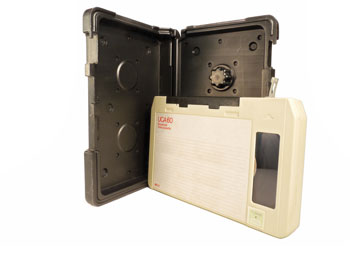
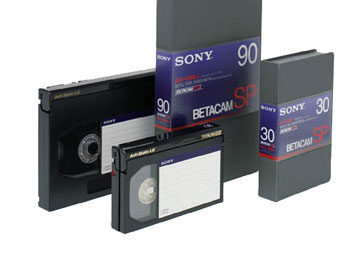
Betacam Betacam to DVD Varies (Running time stamped on tape)

Benefits of Local Image Scanning – Read Before Shipping!

DVD Your Memories is one of the few companies primarily built for our local image scanning and video transfer customers who wish to transfer their old memories and convert them to a more modern format, such as VHS to DVD, slide scanning in Orange County, and transfer 8mm film to DVD in San Diego. Images, such as photographs, slides, and negatives have been around for decades as a means for people to capture special moments. Often times, as well collect and take new pictures over the years, these images can begin to take up all sorts of space! In this new technological era, many of us would find it much easier to digitize the images onto a computer, and load them all onto a DVD or a hard drive. However, many people do not have the time to do this themselves, and instead opt to use a transfer or scanning service to accomplish it for them. Usually you would box your photos up, and ship them off to destinations unknown, and pray you get everything back. However, have you looked to see if there are more convenient local options available? Here are some of the benefits of keeping your media local.

Peace of Mind – Keeping your images local, and close to you will ensure that your media will not get lost in transit, or misplaced at any point during the shipping process. Since we, at DVD Your Memories, handle all of our orders directly in our offices, you’ll know where your precious media is at all times. Once you leave your memories in our hands, they will remain safe until you come in to pick up your new DVDs.

Customer Experience – DVD Your Memories is set up to allow one on one interactions with the image scanning technician working on your order. This starts with the initial order-taking process. If at all possible, we will match your image scanning order with the technician who will be doing the bulk of the work on the order. (For instance, if you instead had order of audio cassettes to CD in San Diego, our san diego audio technician, would be the one to take your order that day. This same technician will also be contacting you throughout the transfer process to indicate when the order had been completed, or if any additional information is required. In turn, our customers are encouraged to contact their technicians through phone or email, if they think of anything else they’d like to add or otherwise change their initial order. This will help ensure that your order is processed to your exact specifications and details.

Fast Turnaround – When dealing with local companies, you will often get a much faster turnaround than if you were to mail it off to a processing facility. Depending on how much media you bring in, we can sometimes have your order finished within 24 hours. This alone will save you not only time, but massive shipping and handling costs.

Competitive Costs – While you may not find the extreme low costs you’d see from businesses employing the use of document scanners or third-world labor, DVD Your Memories has a competitive pricing structure, with nice discounts applied if you bring in more and more media.

Visit our store locator page to find the DVD Your Memories around your area.

Our Irvine Office Moves Across the Street!

Greeting everyone! Just to let everyone know, our Irvine office has moved right across the street. The new address is:

18195 McDurmott East, Suite D
Irvine, CA 92614

Here’s a Google map for quick updated directions.

We are pleased to announce that your local, professional and specialized Family Media Transfer Technicians are now located at 18195 McDurmott East, Suite D, Irvine, CA 92614. The old store has been moved and all orders can now be picked up and dropped off at our Irvine office. We will continue our mission to provide the highest quality video transfer service in Irvine and film to DVD in Irvine.

How to Play AVI Video Files

If you’ve ever had trouble trying to play AVI video files due to codec issues, this article is for you.

AVI is a very common video container that’s used widely throughout the world. Many people convert video to AVI and other popular formats, only to find that the resulting video will not play. To play an AVI video you’ll need a video or media player and a codec. If you have Windows, it comes bundled with media player called Windows Media Player. One of the more confusing things about digital video is the difference between the video container and the codec.

A file format, such as AVI, is simply a file format, and does not define how the video was actually made and what instructions the computer requires to open, or decode it. The video inside the AVI is typically compressed video that is made with what is called an encoder. A codec is actually short for coder/decoder. When the video was first created, it’s encoded in a particular format and method that requires that same particular decoder in order to play back the video. So, in essense, a codec is like a “key” that installs onto your computer that will “unlock” videos in order to allow you to watch.

Computers are typically bundled with many of the common codecs, so you may notice that many videos in AVI format will play fine right off the bat, while other AVI videos do not. So, in order to open that picky AVI video, you’ll need to figure out what codec you’ll need.

One of the easiest ways to get a video of any format to play on your computer is to download VLC Media Player, and attempt to open the video using this program. VLC will play about 95% of videos found on the internet.

On the other hand, if you have an additional media player you prefer over VLC, You can try to download the codec pack called FFDSHOW. This is a free, open source project. FFDSHOW adds support to your operating system for most common video compression methods and also provides good support for using subtitles and various picture improvements when playing a video.

Simply download the installer file and execute it. After that, follow the on-screen instructions to install the codec.

Another method that some people use is downloading codec packs. These can be helpful in getting odd videos to play, however they typically come bundled with more codecs than you would ever need, and more often than not, you end up bogging down your system.

A more advanced method involves finding out how the video was compressed, and then downloading the codec once you discover it through programs such as AVIcodec, which can be downloaded from Afterdawn at the link below.

AVIcodec

DVD Your Memories provides video conversion in Los Angeles, Orange County and San Diego

What Video Format is Needed For A Playable DVD?

Video Format for DVDs

Use the MPEG-2 Video Format

There’s so many video formats out there now that it’s hard to know which one to use. Especially when burning media to a DVD, it’s hard to pick the right format for a DVD player. This guide aims to explain 1) When to consider making digital files into DVDs and 2) Which video format makes the most sense for it. The trick to getting video into a playable DVD format is to first encode the video into MPEG-2 format. DVDs that you buy store their data in the MPEG-2 format. For that reason, a homemade DVD formatted as MPEG-2 will be compatible with a DVD player or a Blu-Ray player. As such, TV stations, TV receivers, DVD players, and other equipment are often designed to this standard. You’ll get the best results adhering to it.


Do You Still Need to Worry About DVDs?

Although DVDs are usually second-best to digital files on your computer, they’re still very useful sometimes. Maybe you’ve recently had an old family VHS tape transferred to a DVD or digital file and you want to give out copies as a gift. Something you can hold certainly makes a nicer gift than a digital file! Or maybe you’ve got some old movies as digital files and you want to view them with the best possible picture. Burn them to Blu-Ray! 1080p on Blu-Ray is much better than digital 4k.

Why is Blu-Ray Better than Digital 4k?

The short answer is that the bitrate is much higher. In this example, bitrate is the amount of data that’s contained in any given frame of video. Blu-Ray’s bitrate is meaningfully higher than Digital 4k’s bitrate. That translates to sharper images, deeper color, better shadows, and less “crushed blacks” – less loss of detail in darker areas of the frame. If you want your digital content – whether it’s home videos, a film you’ve professionally produced, or anything else – to look its best, burn it to a Blu-Ray DVD.


How do I Transfer Video Formats?

Okay, you’ve (hopefully) decided to transfer your file to MPEG-2 for burning to a DVD. So, in order to transfer your video file to an MPEG-2, you need to pick an online video converter. Try to look for one that doesn’t shower you with ads. Programs you need to download are okay, just make sure you’re downloading the actual program and not any malware. Here’s the one I like to use most of the time, for video files I don’t want all that much control over.

dvd logo

Video File Compression

However, if you’d like more say into how you compress your video, I recommend a program called Super C. This is a handy little video conversion tool that will convert all sorts of video into anything you want. The website does look a little bit dated and the program is something you have to download, but the tool works and is pretty good. You’ve got control over lots of things about how your video converts. In addition to MPEG-2 conversions, you can convert to WMV, AVI, MP4 and many more. There’s different uses for all those different kinds of digital formats, so here’s a good guide on what those files are all best for.


How Should I Burn my DVD?

As far as DVD burning software goes, there’s free and there’s paid. The paid software does tend to work better than the free (it’s faster, the capture quality is better, etc), but if you want something you can use to quickly burn a DVD, I recommend CDBurnerXP. Despite the name, yes, you can burn to DVD, and yes, you can use it on a modern operating system. The best paid option for casual use is Toast DVD.

1 29 30 31 32 33 44