Compatibility Guarantee - All Media Transferred Local

Photo Scaninning

Photo
Scanning

Slide Scaninning

Slide Scanning

Negative Scanning

Negative Scanning

Video Transfer

Video Tape Transfer

Film Transfer

Film
Transfer

Audio Transfer

Audio Transfer

Slideshows

Celebration
Videos

Latest Posts

DVD Your Memories Denver Opening this Week!

Don’t forget about your old film and video tapes! Many of us have tons of memories recorded on all kinds of different media such as 35mm slides, video tapes, loose photos, old 8mm film, etc. At DVD Your Memories we can preserve that video or image forever on one of our special archival DVDs that you can even hand out to family and friends! Never worry about our discs not playing on your equipment, because we offer a complete compatibility guarantee on ALL of our services! In addition to this, all of our DVDs are labelled to your exact specifications, so organization of your new media is an absolute breeze. Our newest location in Denver is nearly ready to open! Check out some of our services we provide in Denver:

DVD Your Memories has opened it’s new office in Denver and we’re now processing orders of all types including Denver VHS to DVD, Photo Scanning, Slide Scanning, and Film to DVD projects! We’ve been working hard all week to ensure everything is in perfect working order. We dedicate ourselves to providing our customers with a one of a kind experience of transferring their cherished memories over to DVD and hard drive. Check out the images below for a quick view of the new office on moving day. So next week, come say hello and recommend us to your Colorado friends and family for local, on-site, friendly media transfer! We are proud to be your #1 choice for safe-handling, customization and easy-viewing of personal memories in Colorado!

Fun Arts and Crafts From Recycled LP Vinyl Records

Last week we looked at some fun things to make out of video tapes including making a book end, school notebooks, and gift wrap . This week, I’ll show you guys another cool household item that can be made from recycled LP vinyl records.

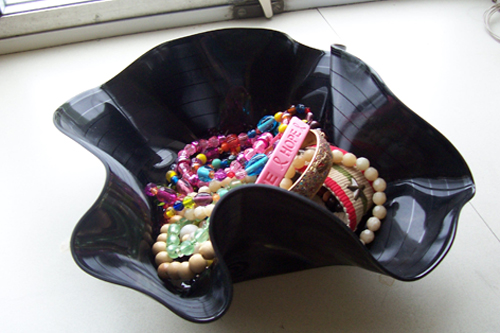
As it turns out vinyl records are pretty flexible, and will easily mold to a variety of shapes with a little heat. With a little creativity you can actually create a wide array of different objects. Today, I will show you how to make a bowl out of a used vinyl record. You can actully create this using your household oven, or even on a really hot day!

1. The first step is to find a record that you no longer care about, as this process will destroy the sound on your record! If you do happen to like the songs or artist, I would suggest transferring the LP to CD, or transferring the vinyl to MP3 in order to preserve it’s contents before creating your bowl. Once you have the album you’d like to make a bowl out of, it’s time for step two.

2. For this step, you’ll need to pre-heat your oven to around 200 degrees.

3. Once the oven is heated, place a medium sized metal bowl onto a baking sheet and then put the record on top of the bowl. Place the baking sheet with the bowl and record into the oven to heat up.

4. Keep a close watch of the activity inside the oven, as the vinyl will start to flop over and bend after 4-8 minutes of heating.

5. Once you notice that the record is getting pliable, take the whole thing out of the oven (using oven mitts to protect your hands).

6. Once it is out of the oven, you can continue to shape the record either by hand, or use another bowl to help bend it into the desired shape. When you get it into the shape you want, let it sit and cool for 15-20 minutes.

7. Once it’s cooled off you can now use your new vinyl bowl to hold your various items! Awesome!

Difference between VHS and VHS-C Tapes

Although they look entirely different, VHS and VHS-C tapes actually share the same type of magnetic recording tape. This is due to the fact that the manufacturers wanted consumers to be able to play the smaller tapes in a standard VCR, with minimal of extra equipment. Usually, to play your VHS-C tapes on your VCR, you’d need a VHS-C adapter. The adapter has a special compartment that houses the VHS-C tape, and helps guide the tape through the run in your VCR. Do not confuse a VHS-C adapter to be able to play other tapes, such as using it as an adapter for Hi8 tapes.

As you can see, the main difference between the two is the shape and size of the casing. VHS-C tapes were intentionally built to be of a small form factor due to rising competition from the smaller Video 8 tapes and to provide consumers with a smaller medium so that they could use them for compact camcorders. The one drawback that VHS-C had compared to other types at the time, was the recording capactity. Video8 and Hi8 could exceed 2 hours on standard recording, while VHS-C was limited to 20-30 minutes per tape. However, VHS-C still sold well due to the fact that videos could easily be copied to VHS tapes, and the ease of playing it on your home entertainment system, as the VHS tape was the most popular format for entertainment and movies.

In this day and age, finding a VHS-C casing for a video tape repair can be challenging, especially considering they have been out of production for a number of years. Technically, if performing a tape repair on a VHS-C tape, you can a standard vHS casing. To do this correctly, you’d need to carefully unwind the tape from the VHS-C spool, and attach it to the VHS spool. You cannot use a VHS-C spool in a VHS case, the tape must be physically attached to the new spool. From here, you can simply wind it up until the tape is fully encased in the shell.

Fun Ideas to do With Old VHS Tapes

People often take up the hobby of green-crafting to pass time, help reduce garbage, and make awesome things! VHS tapes have definitely become obsolete in the last decade or so, with all of the new age Youtube, internet TV, and digital video, many people have forgotten about the video tapes of the past. Instead of throwing away your old tapes, you can instead turn them into works of art that anyone can enjoy!

Check out some of the cool arts and crafts people have made out of old video tapes

This is a book end constructed out of old VHS tapes with blank CDs glued to the bottom to act as a base. This creates a fun and functional display of your newest books for everyone to see.

This is a notebook created from masking tape on the edges, with woven strips of VHS tape on the inside.

You can even use old VHS tapes for gift wrap or bows!

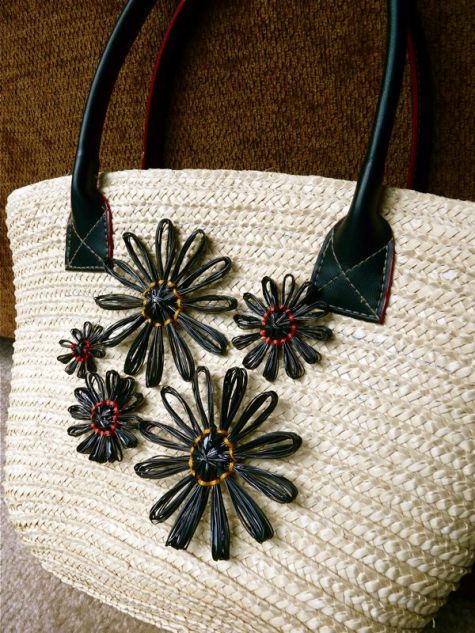
In addition, you can also create lovely designs to accomodate your purses and bags. VHS tape can be stretched and formed into loomed flowers. Stretched video tape also is great for creating macrame jewlery such as bracelets!

So after you have converted your VHS to DVD San Diego, why not try reusing the tapes in a fun and creative way!

For more reading, check out the CraftStylish blog

Tips for Transferring Video 8, Digital 8 and 8mm Video to DVD

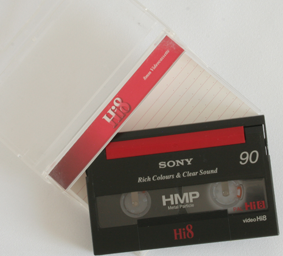
If you’re stuck transferring Video 8 or trying to convert video8 to DVDor digital 8, or 8mm video tapes, then you may have already looked for an 8mm or Video 8 VCR adapter to no avail.

As it turns out, there is still a way to convert and transfer video8 tapes to your computer. If you have managed to break, sell, or lose your camcorder over the years, you’re unfortunately going to have to purchase one, or borrow one from a friend in order to do the transfers. Some companies did actually make some standalone decks for playing 8mm tapes, but they much more expensive, larger and clunkier than a camcorder is.

Once you have obtained some way to PLAY the tapes. The next step is to connect them to your computer in order to capture the footage. There are cheap converters that work through your USB port, but the resulting video quality is not as good as other methods. For the highest quality, I recommend using a firewire capture device, such as a Canopus ADVC110. With one of these converters, you can be sure you’ll be getting a high quality output file, instead of a poor quality, encoded on the fly type of file.

Once the video has been captured to your computer, you’re now ready to make DVD movies or upload them to the internet!

Three Tips for Great Photographs

Learn about our Three Tips for Great Photographs

Tip one: Know your subject

Although it might be an obvious step, a lot of people don’t seem to think about this before taking photos. You should always determine what the subject of the photo is going to be prior to taking it. If you don’t, you end up taking pictures of random things and situations, and they don’t always look so good. You should also try to make the picture you capture focus on the subject.

Sometimes the picture you capture doesn’t express what you saw in the viewfinder. Let’s say you took a picture of Billy playing in the front yard. When you get the prints back and get ready for photo scanning, you still see Billy there, but you also see the bumper of your car, half a bush, a trashcan, and the neighbor’s broken gate. This is all a part of knowing what your subject is. The viewer of your image should not struggle to figure out exactly what the photo is supposed to be of.

Tip two: Draw attention to your subject

Now that we have established the subject of the photo, it’s time to draw attention to your subject. The easiest way to do this is to fill the frame with your subject. This technique obviously draws attention to your subject, because it’s the only one in the photo! The neat thing is that this trick will work with any camera at any time. Just fill up the viewfinder and snap away. So remember to draw attention to your subject whenever you look in the viewfinder. You can even ask yourself: “Does the image I see draw attention to my subject?” and ask, “Do I see anything in the frame that might distract the eye of the viewer from my subject?”

Tip three: Simplify your image

Now that the first two steps have been applied, it’s now time for the third, and sometimes most effective tip. You want to keep your images simple, especially if focusing on a single subject. Before taking the photo, look through the viewfinder and look for any objects that might be distracting or might draw attention away from the subject. This mostly applies to objects along the edges of the frame that might lead viewers eyes away from the subject. If you notice something, get rid of it! This can be done by moving the object out of the range of view. If it’s not movable, try moving your camera! Create different angles and try different areas to get that beautiful shot. If those two tricks don’t work out, then you could always try to move your subject.

What is SECAM?

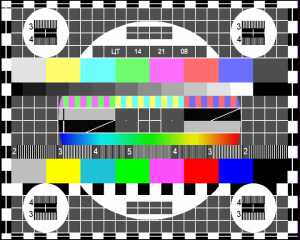
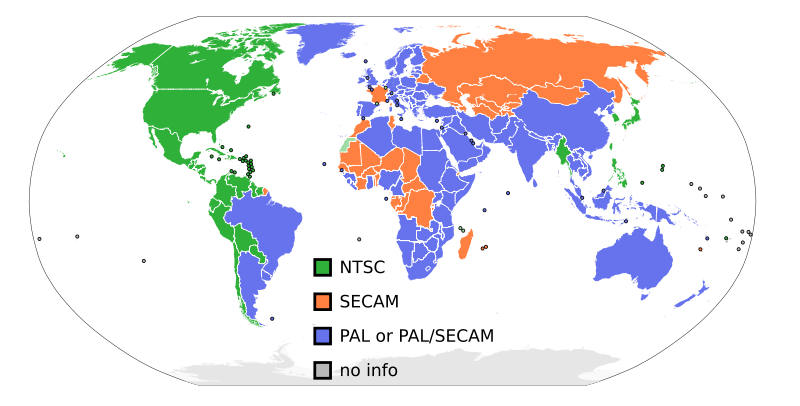
In addition to PAL formatted video tapes, there is also another format called SECAM, which part of the world uses. SECAM is short for Séquentiel couleur à mémoire, which means “Sequential Color with Memory” in French. Historically, it is the first European color television standard, first used in France. Today, this format is used in France and Russia, some Eastern European, and some African countries. Additionally, many media transfer facilities are able to convert SECAM to DVD, SECAM to NTSC, and SECAM to PAL conversions

Technically, SECAM is similar to PAL. The difference being that SECAM does not use phase to modulate the color sub-carrier and only sends one set of color information, not two. SECAM uses a YDbDr modulation and has a delay line to remember the information from the previous line.

Unlike PAL or NTSC, analog SECAM television cannot easily be edited in its native analog form. Because it uses frequency modulation, SECAM is not linear with respect to the input image (this is also what protects it against signal distortion), so electrically mixing two (synchronized) signals does not yield a valid signal, unlike with analog PAL or NTSC. For this reason, to mix two SECAM signals, they must be demodulated, the demodulated signals mixed, and are remodulated again. Hence, post-production is often done in PAL, or in component formats, with the result encoded or transcoded into at the point of transmission. Reducing the costs of running television stations is one reason for some countries’ recent switchovers to PAL.

Most TVs currently sold in SECAM countries support both SECAM and PAL, and more recently composite video NTSC as well (though not usually broadcast NTSC, that is, they cannot accept a broadcast signal from an antenna). Although the older analog camcorders (VHS, VHS-C) were produced in SECAM versions, none of the 8 mm or Hi-band models (S-VHS, S-VHS-C, and Hi-8) recorded it directly. Camcorders and VCRs of these standards sold in SECAM countries are internally PAL. They use an internal SECAM to PAL converter for recording of broadcast TV transmitted in SECAM. The result could be converted back to SECAM in some models; most people buying such expensive equipment would have a multistandard TV set and as such would not need a conversion. Digital camcorders or DVD players (with the exception of some early models) do not accept or output a SECAM analog signal. However, this is of dwindling importance: since 1980 most European domestic video equipment uses French-originated SCART connectors, allowing the transmission of RGB signals between devices. This eliminates the legacy of PAL, SECAM, and NTSC color sub carrier standards.

Europe, at the time, considered NTSC to be undesirable because of its problem with tint and requiring an additional control. SECAM and PAL solved these problems. On a side note, the joke at the time was that “SECAM” stood for “Something exceedingly Contrary to the American Method” versus NTSC “Never Twice the Same Color” whilst “Peace At Last” was granted to the PAL system. Another version of the joke explains PAL as “Picture Always Lousy”, “People Are Lavender”, “Pay Another License”.

1 28 29 30 31 32 44