Compatibility Guarantee - All Media Transferred Local

Photo Scaninning

Photo
Scanning

Slide Scaninning

Slide Scanning

Negative Scanning

Negative Scanning

Video Transfer

Video Tape Transfer

Film Transfer

Film
Transfer

Audio Transfer

Audio Transfer

Slideshows

Celebration
Videos

Latest Posts

Is Your Film Wrinkled or Curled? It Can Still Be Converted!

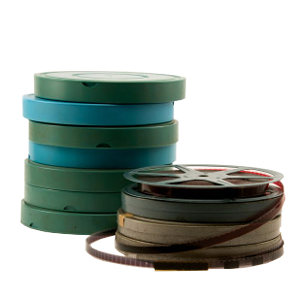
If you’ve ever been digging around and found the old family films and smelled a strong hint of vinegar, this could be trouble for your film! This smell is what’s associated with what’s called vinegar syndrome, which is a term that describes a breakdown of the chemicals and emulsion of your film. This deterioration also causes the film to curl and buckle at the sides and become very brittle to the touch. If you know your family film is suffering from vinegar syndrome, it’s best to get it converted to DVD as soon as you can, especially since it’s irreplaceable footage. DVD Your Memories has been successful many times in the past recovering badly curled film, and film that was suffering from vinegar syndrome. Our film to DVD technicians can help you assess your film at the time of your film transfer order, and explain how the transfer process can work for you. Proper film storage is crucial to preserving its life, and keeping it from deteriorating. For optimum film storage, you should keep them in plastic cans, stored in cool temperatures in a area with not too high of humidity. Improper storage can result in what’s called vinegar syndrome.

Scan Slides Using Household Items!

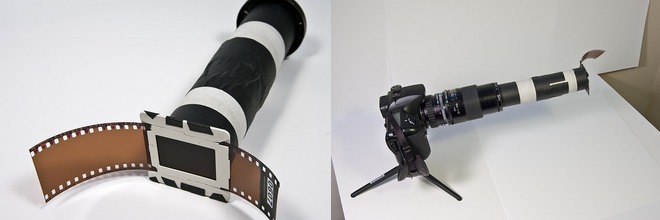
If you’re ever in a pinch, and need to scan slides or negatives using household items, this is for you! With just a simple toilet paper roll and a DSLR camera, you can take fairly decent scans of your slides with no high-end equipment necessary. For true archival quality, we always recommend using a dedicated slide scanner. “Thiim’s method eschews slow, bulky scanners and doesn’t even think about mail-in scanning services. He uses the fastest scanner he has: his DSLR. Onto the front are mounted an old manual focus (90mm) lens, an extension tube (which moves the lens forward and allows closer macro focusing). Then things get creative, with a couple of toilet-paper tubes taped to an old filter with the glass removed, along with a plastic 35mm slide-mount on the end. The mount is opened at the sides to let the film slide through.” Click for the full post.
Convert Audio to MP3, FLAC, or Other Compressed Format

This article will cover how to convert audio to MP3 and other formats.

Converting audio files to another type of file like MP3, FLAC or Apple Lossless is a pretty straightforward process.

First of all, there are tons of different audio converters out there. Some are free, some might even be bundled with your system already. For these instructions, I will be using an open source audio conversion program called CDex. You can download it free here: https://cdexos.sourceforge.net/?q=download

Make sure you select the correct version for your operating system, as there are several versions to choose from.

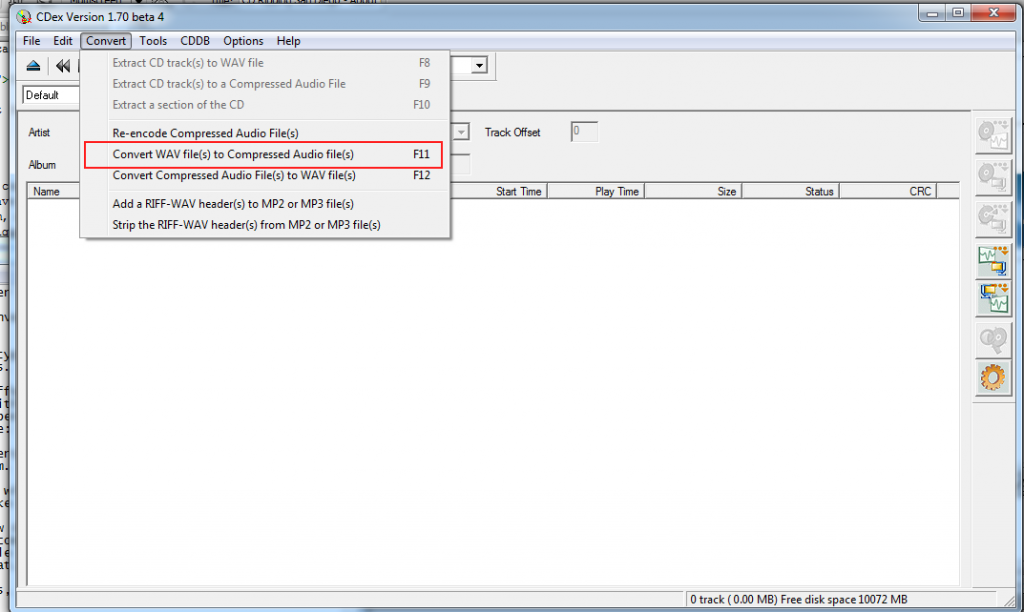
Once the program is installed, you will see the main user interface which is should be similar to the screen like mine below.

This program allows you to do a few different types of conversions: You can convert uncompressed WAV files to compressed files such as MP3 or FLAC. You can also convert a compressed audio file into a WAV file. Lastly, you can re-encode compressed audio into another format.

In order to convert WAV audio files, press F11, or click the Convert menu option followed by the Convert WAV file(s) to Compressed Audio file(s).

A new window will appear, giving you the option to now select a directory on your computer.

You will want to point it to the location of your WAV audio files. To do this, click the small button next to the directory. Find the directory on your computer that contains the wav files. If your files are in subfolders, make sure to click the button “Look in Subfolders”. If you don’t want to include subfolders, leave this box unchecked.

If the list on screen looks to be what you want to convert, press the convert button and the program will begin the conversion process.

You can follow these very same steps to convert MP3 or other compressed audio files to WAV, also you can convert compressed audio to other formats of compressed audio by selecting Re-encode compressed Audio files from the convert menu.

How to Convert Your CDs to MP3 Files Using CDex

By converting your cds or music collection into MP3, you’ll not only be archiving your cherished music, but keeping them in a format that is low on disk space, but maintains your music’s rich sound quality. This guide will show you how to not only convert your CDs to MP3 and WAV, but also convert your existing audio on your computer into other formats.

For these instructions, I will be using an open source audio conversion program called CDex. You can download it free here: https://cdexos.sourceforge.net/?q=download

Make sure you select the correct version for your operating system, as there are several versions to choose from.

CD Ripping Guide

Once the program is installed, you will see the main interface which is should be similar to the screen like mine below.

Now place the CD you’d like to rip into your CD-ROM drive. Once the disk is read, you’ll see a track listing appear in the window. This will list all of the tracks found on the current disc. You have the option to pull single tracks off of the disc, or to simply rip the whole disc into a folder. Before you start ripping the music, you’ll need to set the type of encoding you’d like, as well as the output directories, or where the files will end up after they’re pulled off of the disc.

To change the settings press F4 (or click on the options menu, then settings).

First, we’ll want to make sure we have the correct encoder selected. The encoder is what’s used to convert your audio to another audio type. Most people prefer MP3 audio because of the small file size and great sound quality, but this program supports many other formats such as WAV, OGG Vorbis and FLAC. For this example we’ll be converting our CD to MP3, so we want to make sure the encoder is set as “Lame MP3 Encoder”. In the box below, you’ll be able to set the bitrate, which is how high of quality the output files will be. Keep in mind, that the higher the bitrate, the larger the file sizes will be. Most people encode their music between 192kbps and 320kbps.

Under the “General” tab, click on the Directories and files line. To set the directories, click on the button next to the file tree to browse your computer for a folder. For this guide we’ll be saving to a folder on the desktop titled “cd rip”.

In this window you can also change the file name format. This can be a little tricky, but there is a great on-screen guide to help you. Simply set the variables in the order you’d like, and the songs will be labeled as such when they output.

There are much more settings to play around with if you feel like further configuring your CD ripping. You can set the encoding settings as well as tags and metadata options. Once the settings have been squared away, it’s now time to rip the disc. To extract all of the audio at once, you’ll want to select all by pressing Ctrl-A, or right click and select all. To export your disc as a WAV file press F8 or click on the “Convert” menu item and select Extract CD track(s) to WAV. To export your audio as an MP3 or other encoding, press F9 or select Extract track(s) to a compressed audio file. Once finished, the tracks will be placed in the folder you selected in the settings.

Alternatively, you can also rip and convert single tracks by right clicking on the track and performing the same steps as above.

In the next article, I’ll explain how to convert existing audio files into compressed audio formats.

Top 3 Photo Apps for Smartphones

Instagram

Likely the most popular of the hand-held photo apps, Instagram offers tons of features to enhance your photos taken with your smart phone. Instagram is full of custom filters and settings that you can apply, as well as a huge user base of over 15 million people! You can upload your photos, or instantly share to all of your social networking sites instantly from the app.

Photosynth

Photosynth allows you to take beautiful panoramas near effortlessly. The program utilizes advanced digital ICE filtering to create an awesome effect all on it’s own. All you need to do is capture the first image, and then the app does the rest.

Adobe Photoshop Express

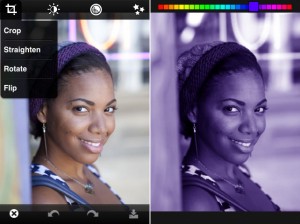
Adobe Photoshop Express allows you to have a mini-photoshop right in your pocket! You can do instant touchups on the photos you’ve just taken with your phone. You can crop, straighten, rotate and flip; adjust brightness, contrast, tint and saturation; add sketch, soft focus and sharpen effects; and tack on a number of Instagram-like effects and borders. It’s pretty basic, but a lot cheaper than it’s full version counterpart.

Difference Between SP, LP, and EP For Video Tape Recording

You may have noticed that your camcorder or VCR supports different recording modes. These are commonly abbreviated by the letters SP, LP and EP.

SP is short for Standard Play. Standard play allows you to record information onto the tape the way it was intended, with no quality loss. By default, VCRs and camcorders will record your footage as standard play. On a standard VHS tape, recording footage in SP mode will yield 2 hours of video.

LP is short for Long Play. Long play allows you to record much more information at the expense of quality. It accomplishes this by reducing the speed the tape is run through the VCR. As the tape speed decreases, the quality will also decrease. You’ll notice this effect when comparing a tape recorded at LP versus one recorded at SP, especially after years of storage. The LP tape will appear more blurred, have more tracking and color issues than tapes recorded at SP. A VHS tape recorded at LP can hold roughly 4 hours of video.

EP/SLP is short for extended play. Extended play is similar to LP, but actually provides you even more recording time. EP was primarily used to document long, continuous events without the need to change video tapes every 2 hours. Due to the fact that the video is not of optimal quality, many times this setting was not used in order to preserve the quality of your footage. Tapes recorded at EP usually are the most problematic after years of storage, displaying a wide variety of tape damage symptoms including color loss, audio loss, frame skipping, and tracking issues.

CD Ripping in San Diego

Our sister company, CD Ripping San Diego has now opened! Our professional audio CD ripping services provide you with new ways to listen to your collection of audio CDs. We can transform your CDs into a wide variety of audio formats including CD ripping to MP3, FLAC, WAV, and AAC. By converting your collection of CDs to audio files, you’ll have the freedom to bring your audio with you, anywhere you go! CD Ripping is a term for extracting the audio from your CDs and placing them as audio files on your computer or hard drive. Audio CD ripping a great way to not only scale down the size of your collection, but also help secure your audio for the future. By audio CD ripping your collection to digital files, you open up new avenues for you to enjoy your music and audio. We can even convert CD to iPod, iPhone and other mobile devices. More and more people have begun to convert their collection of audio into a more manageable format such as MP3, Apple Lossless, or FLAC audio. By using audio files, you can listen to your music on the go, in your car, or wherever else you may be in the world. Never worry about losing or damaging your delicate discs as everything will be stored on your own personal hard drive for safekeeping. We use premium metatagging databases on every order we recieve to ensure that all of your albums has correct artist name, album name and song title. We can even provide you with free album artwork if available. With multiple file formats and bitrates to choose from, you can convert your music into a format that is perfect for your devices and situation. If you have a few CDs of your own you’d like to rip, we have a great guide on how to rip CDs using Windows Media Player!

1 22 23 24 25 26 44