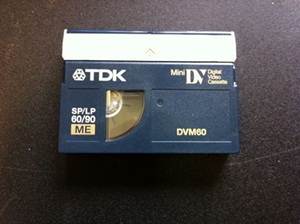
Repairing a Mini DV tape is actually not very difficult at all, once you have the right tools. In many ways, it’s very similar to the VHS tape repair and audio tape repair posts I made a while back. Although tapes can become damaged in many different ways, tape breaking is one of the most common types of damage to these miniDV tapes. In this guide, I will illustrate how to repair a Mini DV cassette with broken tape.
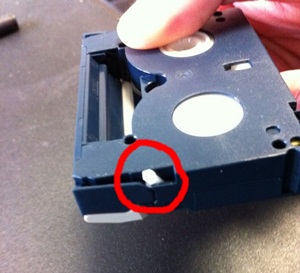
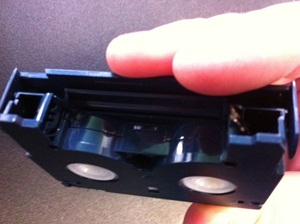
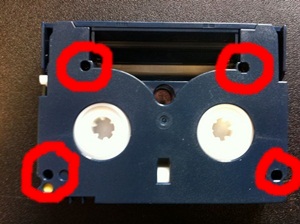
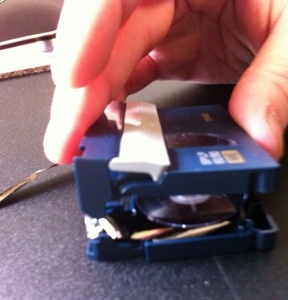
To start off, inspect the tape for what kind of damage you’ll be working with. It might be a little hard to see at first because of the small size of the tape, but an easy way to check for tape breakage is to press down the little white tab and flip the protective flap over and inspect if there is tape there. If you see no tape, then the tape has snapped and is in need of a re-splice. The tab is circled in red below. The image to the right shows that the tape is damaged, because both ends have been separated and stuck inside the casing.
Once you’ve figured out the problem, it’s time to open up the cassette. To accomplish this you’re going to need a small screwdriver. A jeweler’s kit or tools are very helpful, as the screws for Mini DV cassettes are rather small. There are 4 screws in the cassette, check the image below for the locations.
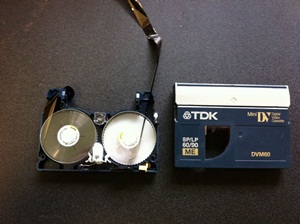
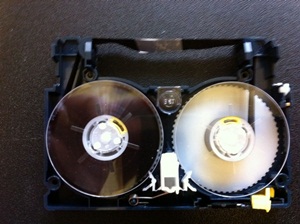
Once the four screws are out, the next step is to carefully separate the two halves. Before you start, turn the tape back over, so the front is facing you. Next, pull back the top flap and carefully separate the two using a gently rocking motion. Be sure not to force it apart, as there are tiny pieces inside which, if lost, will make the repair job much more difficult. Once separated, set the top shell off the the side for the time being, and concentrate on the side that contains the two reels of tape.
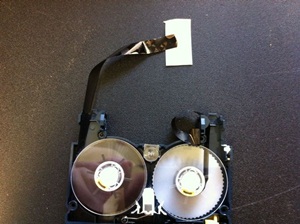
With the two sides apart, it’s now time to re-splice the broken tape. For this step, I recommend obtaining some video tape splicing tape. Scotch tape can be used as a makeshift solution, but be advised that the chemicals present in scotch tape will eat away at your video tape over time. The first thing you want to do is to pull the tape out from the reels to give you some more slack to work with. You can do this by either manually taking the reels out of the casing, or by depressing the little white tab in the middle and slowly pull the tape out.
One you have workable tape on both ends, cut a small piece of splicing tape, and place it under the exposed tape. The next step is to carefully place the other end of the tape next to the first, trying to keep it as flush as possible. This step might take a couple tries because you want to be sure the ends will not end up crooked, as this could affect the playback of the tape, or cause it to snap again. Cut off the extra tape hanging off of the sides with a sharp knife or scissors.
Place the reels back into the cassette and guide the tape back through the slots.
At this point the two reels should be joined together, and the tape ready to be reassembled. Reassembly is fairly simple, just follow the previous procedure and carefully place the top half back onto the bottom. Lifting the flap at the top will help you get it on there correctly.
Once done, ensure the tape is nestled in it’s proper place and the mechanisms appear to be working right. When it’s all done you should now be able to play this tape once again.







Dear Chris,
Thank you for your repair guide. What should i do if the tape film is already scratched? how can i save my footages?
Thank you
hi Amir,
If the scratched portion is unplayable, I recommend cutting that section of tape out before repairing.
Chris,
After repairing a mini dv, are you able to play it more than once? I’ve heard you get one shot at it.
Hi Michelle,
You can play the tape as long as the splice holds. If the repair is done correctly, it should last for multiple playthroughs before you’d have to re-splice.
do you repair these if so what is the cost i am 68 and just cant get to grips with it the tape is wrong???? thankyou
Hi Catherine, we absolutely provide tape repair services. To get started, please visit our store locations page:https://dvdyourmemories.com/store-locations/ or if you’re not in one of our local areas, we happily accept mail in orders. You can find more information on shipping here: dvdyourmemories.com/shipping-your-memories/
These instructions skip over a couple of tricky parts of the disassembly/reassembly process. One tricky part is working with the ratchet lock that fits into the bottom half of the cassette between the two tape spools. This lock needs to be pulled back in order to allow the tape spools to turn. And later, when reassembling the spools back into the cassette, this lock needs to be fit properly back into place between them. Another tricky part is not to lose the screws or the little slider for the recording lock.
Yes, there was no mention whatsoever of the very small ratchet subassembly that you must insure either to not allow to become disengaged or you must know beforehand exactly how it goes back in the lower shell….it slides back and forth along a small slot track guide into which a very small tab on the ratchet ass’y fits…also you must watch for the “clam shell” sub ass’y that clamps over the tape when you open the lid.
Hi there,
This is the first time I’ll be doing this but what type of repair tape would you recommend?
Cheers,
Lee
I need my Mimi dv cassette respliced but the cassette has no screws. So how do I open it? It is a TDK mini DV cassette.