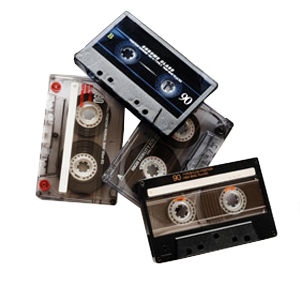
One of the types of requests we see a lot of is people asking how to convert audio cassettes or how to get their audio cassettes transferred to CD or MP3s. What many people fail to realize, is that it’s much easier than you think to perform this same type of audio conversion from your own home!
The first step of the process is to get your hands on an audio cassette player. Any audio cassette player/recorder is fine as long as it has either a 3.5mm headphone jack, or those white and red RCA plugs. If the transfer quality is critical to any of your particular tapes, I’d recommend getting a newer name-brand standalone deck such as Panasonic, Sony. The next step is that you’re going to need access to a computer, which can be Mac or PC. If you already have access to an audio cassette player, and a home computer, you’ll have nearly all the equipment you’ll need for the tape transfer process.
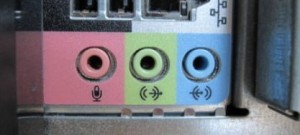
Once you have obtained, or dusted off the old audio cassette player, you’ll want to inspect it in order to find out which type of audio output it is supporting. This is very easy to tell, as it will either be red/white outlets, or a headphone jack, or both. If you have the RCA red/white outputs, you’ll need a converter to combine the two lines into one with what is called an RCA to 3.5mm converter, which you can see an example of 3.5mm Stereo Male to 2 RCA Stereo Female Cable (6 inches). If you’re using a Walkman or other similar portable cassette player, chances are that you’re only going to have a 3.5mm headphone jack as your audio output. In this case, all you’d need is a 3.5mm audio cable similar to what you’d hook an ipod up to your car stereo with. So then you’d simply connect the 3.5mm jack to the cassette player, and the other end to the back of your computer in the Line-in slot, usually colored blue (see picture below).
The next step is to get the software necessary to record the audio. There is awesome free open-source audio editing software called Audacity which you can download and install on either PC or a Mac. Once the program is installed, ensure that the audio settings are correct (verify the line-in is set, and not the microphone or other, consult Audacity help files on this if you’re having problems), and then press play on your recorder, and immediately press “record” on Audacity, and your recording should be underway. Once the recording is finished, all you’ll need to do is hit stop, and then save the .wav file to whatever you choose. I hope this guide will help to steer you in the right direction!
Dont forget, if you don’t have the resources or time to perform these transfers yourself, take your precious tapes down to your local DVD Your Memories in San Diego or Irvine, and have our team of expert technicians transfer your tapes to CD with the highest quality and utmost care.


