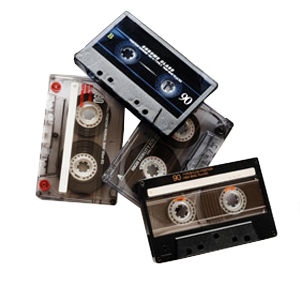
I can remember a time when the audio cassette was king. More portable than vinyl and less prone to damage, it could even be taken in your car or played on personal players like Sony’s
Walkman! Now it has gone the way of the dinosaur, and even its heir, the CD, is falling into disuse. Digital formats such as MP3 reign supreme now. “That’s all good,” you might think, “but I have a mountain of old tapes in my closet. How do I transfer audio cassettes into digital formats? After all, I can’t just put them into my computer.” Good news: It’s easy to explain how to transfer your old audio cassettes in digital formats. The bad news, unfortunately, is that it can be a technology intensive and time-consuming process. The really good news, though? DVD Your Memories offers an easy and inexpensive Audio Transfer service for getting that old audio into the 21st century. For those DIY-ers out there, the basic process is detailed below, and remember, if you get into the weeds, feel free to call in the cavalry at 1-877-FILM-2-DVD.
Steps to Transfer Your Old Audio Cassettes to CD and Other Digital Formats
1. Please read all directions first. This is a process that can be confusing for people who aren’t experts. It can also damage your cassette or your computer if you don’t know what you are doing. If you are not an expert, our Audio Transfer service can quickly, easily, and inexpensively transfer your old cassette, reel-to-reel, or vinyl LP recordings into digital formats.
2. You will need the following: One computer with an audio card and a line-in jack (most computers come with this built-in), a cassette player with a line-out jack, one high quality 3.5mm to 3.5mm cable, the same cable you’d use to hook up your iPod to your car stereo’s AUX input.
3. Connect the cable into your computer’s line-in jack and into the player’s line-out jack. If the cassette deck is old, we recommend cleaning the heads prior to transferring.
4. Open your computer’s sound recording software. Most PC’s have Windows Sound Recorder, which will work, but there are a number of other programs, both free and commercial. Some of these will allow complex editing and for exporting in MP3 format. We recommend the free program, Audacity.
5. Make sure your cassette is cued to where you want it.
6. Start recording on your computer.
7. Start your tape.
8. When done, stop the recorder first and then the tape.
9. Save the file before editing. Depending on the recording program, from here you can export as multiple file types such as WAV, MP3 or FLAC.
10. Editing is an intensive process and may be beyond novices. Make sure to never overwrite your original file whe editing, but instead only edit copies of the file so you can always restart if you make a mistake.
Tips for a better audio cassette transfer
1. Start a low volume! This reduces the risk of accidentally harming your computer’s circuitry.
2. An excellent tip from WikiHow:
“The key to getting a good transfer from tape, especially cassette tape is to get the azimuth right. Listen in Mono and slowly adjust the azimuth screw on the play head on your cassette deck until you hear sound with the maximum treble. You may need to move it a little left and right initially to get a feel of how the sound changes and which setting gives you the best high frequency playback. “
3. Again, to get the results you want this can be a time-consuming process and difficult process, especially if you aren’t an expert. Our Audio Transfer service is a cost-effective, quick, and easy way to get expert results the very first time, without running the risk and damaging your computer or those priceless recordings. Check out our Audio Transfer section for more deatials on the services we offer and pricing.


