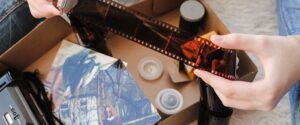



Preparing loose negatives that have been stored in envelopes for decades starts with careful handling, especially if you’ve found old family film in a garage, closet, attic, or storage box. Aged negatives can still scan well, but you need to protect them before sorting, cleaning, or sending them to a negative scanning service.
Start By Checking The Condition Before Sorting
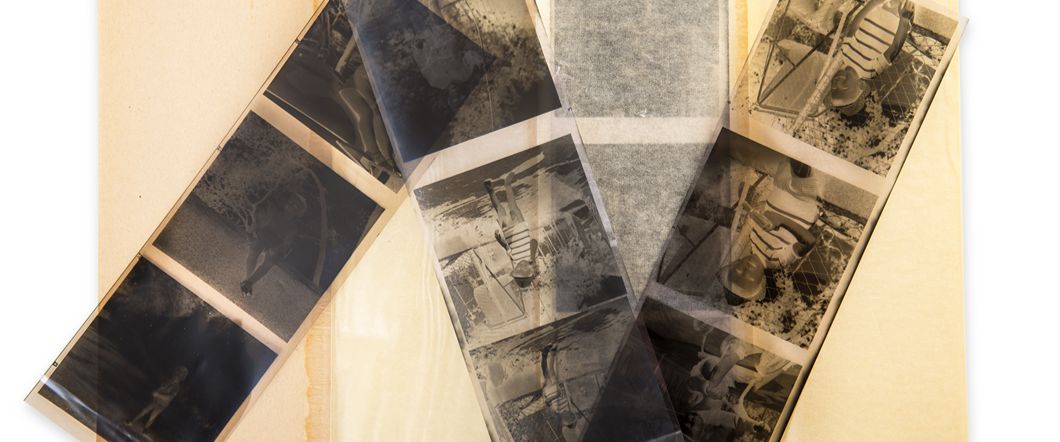
Before you move anything around, take a few minutes to inspect the negatives where they are. Look for curled strips, brittle edges, stuck sleeves, moisture damage, dust, fingerprints, or residue from old envelopes.
Don’t rush this step. Fragile negative handling matters because film can crack, crease, or scratch when you pull it out too quickly. If a strip resists movement, stop and leave it in place for professional review.
Keep Original Envelopes With The Negatives
Old photo lab envelopes often tell part of the story. They may include dates, customer names, locations, roll numbers, or handwritten notes from relatives. Even if the envelope looks worn, keep it with the film until you finish identifying the set.
You don’t need to leave the negatives inside a damaging envelope forever. You do need to preserve the information before you separate anything.
- Photo Lab Name
- Processing Date
- Family Name
- Location Notes
- Roll Number
- Handwritten Captions
Handle Negatives By The Edges
Your fingers can leave oils and marks on the image area. When you pick up a strip, hold it by the edges and avoid touching the frames. Clean, dry hands help, but cotton gloves or nitrile gloves may give you better control if the film curls or feels dirty.
Work over a clean table with enough room to lay out one group at a time. Don’t stack loose negatives directly on top of each other if they have dust, grit, or residue between them.
Separate Negatives By Group, Not Perfection
You don’t need to identify every frame before scanning. Start by keeping obvious groups together. One envelope may hold one roll. One sleeve may hold a family trip. One box may hold several decades of mixed negatives.
Sorting by group helps you avoid losing context. If you split everything into piles too early, you may separate negatives from the dates, names, or events that explain them.
Label Groups Without Writing On The Film
Labels help a negative scanning service understand what belongs together. Write notes on the outside of a sleeve, folder, or envelope, not on the negative itself. Use simple descriptions that will still make sense later.
A label doesn’t need to tell the full story. It just needs to help you and the scanning team keep the collection organized.
- “Grandparents, Unknown Year”
- “Palm Springs Trip”
- “Dad’s Childhood Photos”
- “Wedding Negatives”
- “Mixed 35mm Rolls”
- “Possible Duplicates”
Watch For Brittle Or Curled Film
Brittle negative preservation starts with restraint. Old film can curl tightly, feel stiff, or show small cracks along the edges. Don’t force curled negatives flat with books, clips, or pressure. That can crack the film or leave marks across the image.
Place brittle strips in a clean, dry, protective sleeve if you have one. If you don’t, keep them flat in their original group and avoid extra handling until you get help.
Don’t Try Aggressive Cleaning At Home
Envelope residue negative cleaning requires care. Old paper fibers, adhesive dust, and unknown residue can stick to the film surface. Scrubbing, wiping with paper towels, using household cleaners, or adding moisture can make the damage worse.
If you see residue, separate the affected strip and note the issue. A scanning team can inspect the film and decide how to handle it before digitizing.
- Don’t Use Water
- Don’t Use Household Cleaners
- Don’t Scrape The Film
- Don’t Pull Stuck Pieces Apart
- Don’t Use Tape
- Don’t Wipe With Paper Towels
Store Film Negatives In A Cool, Dry Place
The best way to store negatives before scanning is to keep them away from heat, humidity, direct sunlight, and dust. Don’t leave them in a hot car, garage, damp basement, or near a window.
Good film negative storage helps slow further deterioration. You may not be able to reverse decades of aging, but you can prevent avoidable damage while you prepare the collection.
Decide What You Want From The Scan
Before you send negatives out to be scanned, think about how you want to use the digital files. You may want simple family sharing, high-quality archive files, prints, a slideshow, or a backup copy for relatives. If what you want can be achieved with a lower resolution, it is worth checking to see if there are photos to scan instead, which tend to be less delicate.
Your intended use can affect scan resolution, file formats, cropping, and organization. A little planning helps the finished files match the way you want to view and preserve the images.
- Family Sharing
- Long-Term Archive
- Photo Prints
- Memorial Or Reunion Slideshow
- Online Backup
- Restoration Review
Prepare Your Negatives With Care Before Scanning
Preservation for negatives starts before the scanner touches the film. Careful handling, simple sorting, safe storage, and clear labels can make the scanning process smoother and protect images that may not exist anywhere else.
DVD Your Memories helps customers in Southern California and through mail-in services prepare, scan, and digitize old negatives with careful handling. If you found loose negatives in old envelopes, our team can help you identify what you have and convert the images into digital files you can share, organize, and archive.